Tag Archives: homemade

Sweet and Salty Peanut Butter Cookies

My brother’s birthday is on Monday. Unfortunately (for me, anyway) he is spending the summer working on Nantucket. So, since I will not be able to celebrate the anniversary of his arrival into this world in-person, I’ve opted instead to send him a care package. Along with road atlases of the American Southwest, Chile, and Mexico, a Moleskin journal, and break-away piece of amazing dark chocolate, I am also sending homemade peanut butter cookies; his favorite. I’m a big fan of the sweet/salty flavor combo, so I decided to add some crushed salted peanuts to my usual recipe. These were delicious! I think next time I’ll try making these using cashew butter and salted cashews….and maybe sprinkling a little sea salt over the top before baking too…

Ingredients:

Makes 2 dozen large cookies

– 2 1/2 c. flour

– 1/2 tsp. baking soda

– 1 tsp. baking powder

– 1 c. butter or butter substitute

– 1 c. sugar

– 1 c. brown sugar

– 2 eggs, beaten (or 1/2 c. applesauce if making vegan)

– 1 c. peanut butter

– 2 tsp. vanilla

– 3/4 c. crushed, salted peanuts

Directions:

1. Preheat oven to 375F

2. Measure flour, baking soda, and baking powder into a large bowl

3. In a separate bowl, cream together butter (substitute) and both sugars. Beat until well blended, but not fluffy

4. Add eggs (or applesauce), peanut butter*, and vanilla to creamed sugars

* Tip: To prevent peanut butter from sticking to your measuring cup, spray cup first with a little cooking spray — it minimizes mess and frustration!

5. Add peanut butter mixture to your flour and incorporate fully

6. Add crushed peanuts to dough. I just put my peanuts into a large ziploc bag and used a pestle to crush them…

7. Mix well

8. Using your hands and/or a spoon, roll pieces of the dough to form smooth balls. I made these cookies rather on the large side, but the size you make them is totally up to you

9. Place cookies on an ungreased cookie sheet, with at least 2” between each

10. If desired, press tops of cookies with the tines of a fork to get that old-fashioned PB cookie look

11. Bake for 10 minutes, or until golden

12. Let cool on cookie sheet about 5 minutes, and then transfer to a wire rack or paper towels to finish cooling. I find I get the best results when I bake 1 tray at a time…

And, of course, I had to do a taste test before sending these. Delicious!

1 Comment

Filed under Uncategorized

Decadent Pineapple Upside-Down Cake (with vegan options)

When I asked my stepson, Mason, what dessert he would like for me to make he took the question very seriously. After much conflicted deliberation and mind-changing he decided upon Pineapple Upside-Down Cake. (It was between that and Coconut Cream Pie…so maybe that’s next.) I don’t think I had ever even tasted a real Pineapple Upside-Down Cake (outside of a shot glass, I mean), let alone made one, but after eating a piece of this (okay, more like six pieces…) I am certain I will be making this again. Soon.

Are there things that I would do differently? There are: I would probably make the whole thing from start to finish in a 10” cast iron skillet, so that the pineapple had a chance to caramelize a bit more and have a little more texture; I’d use brown sugar in the pineapple/cornstarch mixture to get a richer, deeper, more caramel-like flavor; I would use pineapple rings in the decorative first layer with the maraschinos to get that classic Pineapple Upside-Down Cake look. But regardless of the type of pan it was made in, what kind of sugar I used, or how pretty it was, there is no doubt that this was one darn delicious cake. Not only did my husband say that it was one of his favorite things I have ever made, but nary a crumb was left of it 24-hours later! With only three people in the house… I think it’s safe to say we liked this cake…and that a few pounds were gained between the three of us….

Ingredients:

– 1 c. sugar (or 1/3 c. brown sugar, 2/3 c. white)

– 3 Tbsp. cornstarch

– 20 oz. crushed pineapple

– 2 Tbsp. melted butter or Earth Balance/butter substitute

– 1/2 c. maraschino cherries

– 1 2/3 c. flour

– 1/2 tsp. salt

– 2 1/4 tsp. baking powder

– 1/3 c. vegetable shortening

– 2 eggs, beaten (or 1/2 c. applesauce for vegan version)

– 1/2 tsp. vanilla

– 1/2 c. milk (or almond milk for vegan)

Directions:

1. Mix 1/3 c. of sugar with the cornstarch. Add juice drained from the pineapple  (about 3/4 – 1 c.)

2. Cook in a saucepan, stirring constantly until sauce boils and becomes glossy and clear:

3. Add drained pineapple and melted butter/butter substitute. Mix well and remove from heat

4. Drain cherries and arrange in whichever pan you’d like to use. I used a 9” spring-form cake tin, but you could use a large skillet or a regular cake pan, even a casserole dish or bundt tin would work

5. Cover cherries with pineapple mixture

6. In a large bowl mix together the flour, salt, and baking powder

7. Cream the shortening with the remaining 2/3 c. sugar and the eggs (or applesauce). Beat until smooth and fluffy. Add the vanilla.

8. Add the flour mixture and the (almond) milk alternately to the creamed shortening, ending with the flour. Mix well.

9. Pour batter over pineapple, smooth evenly to cover

10. Bake in a preheated oven at 350F for 35-40 minutes. The center of your cake should be golden and barely springy when gently pressed with fingertips

11. Remove from oven and let cool 10-15 minutes

12. Turn onto a serving plate and let cool another 10-15 minutes. This part is important — the still hot pineapple juice will seep down into your cake, making it super moist and, well, pineapple-y….This part of the cooling process also allows your pineapple layer to set a bit. I rushed this part; as you may be able to tell from the pictures…

13. Carefully remove pan from cake

14. Serve warm. Do yourself a favor and throw some whipped cream or vanilla ice cream up on this beast….you won’t be disappointed….

Adapted from The Modern Family Cookbook, 1942

1 Comment

Filed under Uncategorized

How To Make Your Own Soy Milk

My husband is a chef and is always looking for new things to experiment with in the kitchen. Although he enjoys many types of food, that man loves meat like no one else I’ve ever known. Like, would eat pork three meals a day if he didn’t think it would hurt him… An on-again-off-again vegan since my teens, meat doesn’t really do much for me. Every once in a while, I do enjoy a roast chicken or a little piece of steak, and I can eat sushi like it’s going out of style, but overall I am pretty content to go without it.

So I was a bit surprised when my husband said that he wanted to try making our own soy milk and tofu — usually the mere mention of something like tempeh or seitan is enough to get a feigned gag, or at least an eye-roll out of him. But to his credit he has been making an effort to eat more healthfully lately, and of course I think that the idea of making something new in the kitchen was exciting for him.

I was amazed by just how easy it is to make soy milk at home; no special equipment required — if you own a blender you can do it! The result tastes better, and is cheaper and healthier than what you buy in the store. This recipe will yield one quart of milk.


What you will need:

– 1 1/3 cups dried soybeans (you can usually find these in the bulk section of health food stores)

– 6 cups filtered water

– A large strainer or chinois

– Cheesecloth, burlap, or a clean piece of thin fabric, such as a cloth napkin, t-shirt, or gauzy curtain — emphasis on clean

– A blender

– An old milk bottle or whatever you wish to store your soy milk in


Directions:

1. In a large bowl soak your soybeans with 3” of cold water. Let stand overnight.

2. Drain the soybeans

3. Put 1/3 of the beans into your blender with 3 cups filtered water. Blend on high. Add the remaining soybeans a bit at a time and continue blending until as smooth as possible

4. Line your strainer/sieve/chinois with 3 layers of cheesecloth or your clean piece of fabric. Set over a large heatproof bowl:

5. In a large pot boil 3 remaining cups of filtered water. Add the soybean paste and boil for about 8 minutes over medium-high heat. Stir constantly to prevent sticking or burning.

6. Pour the mixture into the straining apparatus

7. Let stand until just cool enough to handle — about 15-20 minutes

8. Gather your cloth together and squeeze, extracting as much of the milk as possible

9. Continue squeezing until you can get nothing else out and the remaining solids are nearly dry

10. Discard the cloth with the solids, remove strainer, and skim any foam off of the top of the soymilk

11. Transfer milk to a container and enjoy! Keep refrigerated — will keep up to 2 weeks in a sealed, refrigerated container.


Adapted from Food And Wine, July 2011

1 Comment

Filed under Uncategorized

Peach-Poppyseed Fruit Kuchen

Kuchen is the German word for cake, though it is used to describe an assortment of desserts and pastries. This recipe for Peach-Poppyseed Fruit Kuchen is indeed cake-like, but truly has more in common with bread. With coffee or tea this lemony kuchen makes a perfect summer breakfast; with fresh whipped cream it is a lovely light, and health-conscious, dessert.

Ingredients:

– 2 1/2 c. flour

– 2 Tbsp. butter

– 1/4 tsp. salt

– 2 Tbsp. sugar

– Zest from one whole lemon

– 3/4 tsp. fast-action dried yeast

– 1 egg, beaten

– 2/3 c. warm water

– 2 Tbsp. poppyseed, prepared dessert filling (available in the baking aisle of most grocery stores)

Topping:

– 1 lb. fresh peaches – about three large fruits (though really you could use any stone fruit in this recipe and it would be fantastic)

– 2 Tbsp. butter

– 2 Tbsp. raw or demerara sugar

Directions:

1. Put the flour in a large bowl. Rub 2 Tbsp. butter in with fingertips, until the mixture resembles fine breadcrumbs.

2. Stir in the salt, sugar, zest, and yeast.

3. Add the beaten egg, prepared poppyseed, and enough water to make a soft dough.

4. Knead well on a clean and lightly floured surface for at least five minutes — dough should be smooth and elastic.

5. Put the dough back in to the bowl and cover with a piece of oil cling-film. Let rise at least 1 hour, or until doubled in size. It is very important that you place the bowl somewhere warm or the dough will not rise.

6. Once risen, tip dough out onto a floured surface and knead well again. Press dough into a buttered spring-form pan or a loose-bottomed flan tin. I used a 9” pan, but if you have a larger one (like 11”) I think it may better suit this kuchen to be a little thinner.

7. Halve, stone, and thickly slice the peaches. Arrange them over the top of your dough.

8. Leave uncovered to rise in a warm place for 45 minutes, or until doubled in size

9. Preheat oven to 400F

10. Brush the fruit with melted butter and sprinkle with sugar

11. Bake in oven at 400F for 15 minutes

12. Remove from oven, cover with foil, reduce heat to 350F and bake for another 35-40 minutes.

13. After finished baking, removing from oven and let cool for 10-15 minutes. Using a knife or thin spatula loosen the edges and remove kuchen from tin.

14. Transfer to a serving plate and sprinkle extra sugar over top, if desired.

15. Serve warm or cold, cut into slices. This is especially good warm with some sweet cream butter slathered over it…but then again, what isn’t?


Adapted from The Bread Book by Sara Lewis

1 Comment

Filed under Uncategorized

Raspberry Jam

This recipe for Homemade Raspberry Jam is not only delicious, but surprisingly quick and easy to make. Raspberries won’t be in season much longer, so preserve some while you can!

This recipe is for a small batch of jam, but you could certainly multiply the measurements to make larger quantities.

Ingredients:

– 2 cups of mashed raspberries

– 1/2 c. honey or 1 c. sugar

– 3 Tbsp. water

– 1 tsp. fruit pectin*


*Pectin is a thickening agent, usually extracted from citrus fruits or apples and is available in many grocery stores and most health food stores.


Directions:

1.  Select the jar you wish to put your jam in. It can be a mason jar, or an old pickle or jelly jar — whatever you have available. This recipe will yield about 16 oz. of jam, so you do want whatever jar you choose for this to be pint-sized.

2. Wash and rinse your jar; let stand in hot water. Meanwhile, boil your lid and ring in a large pot to sanitize. Let stand in hot water also.

3. Wash and mash your raspberries. You can use a pestle, fork, a hand-juicer — whatever you have handy!

4. Put fruit into a saucepan with the water and cook at medium heat, stirring frequently. Bring to a boil


5. Measure out honey or sugar; thoroughly mix pectin into sweetener


6. Add pectin-sweetener mixture to boiling fruit. Stir vigorously for 2 minutes to dissolve the pectin.


7. Return to a boil and remove from heat


8. Remove your jar lid and ring from your large pot and return water to a boil


9. While waiting for water to boil fill your jar to 1/4” of top and wipe clean. Do not overfill or jar will not seal properly.

10. Screw on lid (with ring) tightly. Place jar into boiling water to cover. Boil for 10 minutes.

11. Remove jar (carefully!) from water. Let cool. Check seal — lid should be sucked down/un-popped.

12. Label and enjoy! Jam should last about 3 weeks once opened.

3 Comments

Filed under Uncategorized

Jam-Filled Sandwich Cookies


These may be the most delicious thing I’ve ever made. If not, they’re definitely close to the top of the list. Of all of the sweets in the world, sandwich cookie-type-things are definitely amongst my favorites. Whoopie Pies, French Macarons, Oreos….I’m salivating just typing this. Though not as refined  (or anywhere near as difficult to make) as the macaron, these jam-filled cookies are elegant in their own right, and certainly just as delicious. Shoot, I’d take one of these over a whole sleeve of Oreos any day! You wont believe how incredibly easy these are to make — especially if you opt to use store-bought or pre-made jam.


Ingredients:

– 12 oz jam of any flavor. I used the Sweet Plum and Blueberry Jam that I made a couple of weeks ago, but peach, raspberry, apricot, or strawberry would be wonderful choices too — get creative!

– 1 c. (2 sticks) unsalted butter

– 1 c. sugar

– 3 Tbsp. lemon zest

– 1/4 tsp. salt

– 2 large egg yolks

– 2 1/4 c. flour

– powdered sugar, for sprinkling


Directions:

1. In the bowl for an electric mixer (you can do this by hand, but your arm may get tired!) combine butter, sugar, lemon zest and salt

2. Beat until light and fluffy — 2-3 minutes

3. Add egg yolks and mix well

4. Add flour, one half at a time and beat until well-incorporated

5. Divide dough in half. Form first half into a long log, about 1 3/4” – 2” in diameter. Wrap log in wax paper

6. Repeat step six with second half of dough

7. Chill both rolls of dough in the refrigerator until firm, at least two hours. If you are in a hurry you can place dough in freezer, but let it chill in the refrigerator at least one hour first. Can be done one day ahead.

8. If making your own jam for these cookies, or using the recipe linked above, make it now so that it has time to cool.

9. Once dough has chilled sufficiently, preheat oven to 400F

10. Line baking sheet with wax paper

11. Using a sharp knife, cut dough into thin rounds, about 1/3” thick — you may have to reshape rounds a bit with your fingers — and place on lined baking sheet

12. Bake cookies one sheet at a time on a rack in the center of the oven. Bake for 10 minutes — edges should be golden brown

13. Allow cookies to cool completely, sprinkle with powdered sugar if desired

14. Spread as much jam as desired on flat side of cookie, then top with another cookie, thus making a sandwich

15. Try not to eat them all at once….

Super-duper close-up:

Yum….These were so good I had to make my stepson hide them from me….


Adapted from Bon Appetit, June 2009

1 Comment

Filed under Uncategorized

Blackberry Shortcakes with Lemon Biscuits

I was so excited to find what appeared to be ripe, gorgeous local blackberries at the market the other today. Upon getting them home however, I discovered them to be horribly sour. Like, so sour as to almost be inedible. I assure you, my disappointment was immense… Since they couldn’t very well be eaten alone, I figured that the best thing to do was to make something sweet and delicious out of them. Inspired, I decided to do a spin on the classic strawberry shortcake. I love citrus in desserts, and berries with citrus are one of my favorite flavor combinations, so I decided to add lemon zest to the biscuits. The result was a bright, and surprisingly light dessert, and incredibly easy to make.

Ingredients:

Yields 6 Shortcakes

Berries:

– 5 c. blackberries

– 2/3 c. powdered sugar

– 2 Tbsp. water


Biscuits:

– 3/4 c. chilled buttermilk

– 2 Tbsp. lemon zest

– 2 1/4 c. flour

– 1/2 c. packed light brown sugar

– 1 1/2 tsp. baking powder

– 1 tsp. baking soda

– 1/4 tsp. salt

– 6 Tbsp. chilled unsalted butter (3/4 stick)

– 1 Tbsp. raw or demerara sugar


Directions:

Berries:

1. Combine all ingredients in a saucepan

2. Stir over medium heat until berries soften and become syrupy — about 10-15 minutes

3. Remove from heat and let cool. Berries should be served at room temperature. Can be made up to 3 days ahead and refrigerated.


Biscuits:

1. Preheat oven to 425F

2. Line a large baking sheet with parchment paper

3. Combine buttermilk and lemon zest in a small bowl

4. In a large bowl mix flour, brown sugar, baking powder, soda, and salt. Be sure to break up any large clumps of sugar

5. Cut butter into small cubes and add to four mixture

6. Rub butter into flour with your fingertips until the mixture resembles coarse breadcrumbs

7. Add the buttermilk mixture and combine with a fork until just blended. Dough will be sticky and may seem “loose” but don’t add more flour!

8. Transfer dough to a clean, lightly floured surface. Knead 4-5 times, but be careful not to overwork (over-handling will make your biscuits tough)

9. Pat dough out until about 3/4” thick

10. Using a 3” cookie cutter (you could also use a greased drinking glass or mug if you don’t own a cookie cutter), cut dough into rounds

11. Combine dough scraps, pat out, and cut into rounds until no dough remains. You should have 6-7 in total

12. Place rounds on your lined baking sheet and sprinkle with sugar

13. Bake biscuits at 425F for 15 minutes, or until golden and a toothpick or knife inserted into the center comes out clean

14. Cool slightly — about 15 minutes

15. Using a serrated knife, cut each biscuit in half. Spread blackberry mixture over each bottom-half, dividing equally. Place top half of biscuits on blackberries, then top each with an equal portion of the remaining blackberry mixture.

16. Top shortcakes with vanilla ice cream or whipped cream. Serve and enjoy!

Adapted from Bon Appetit, June 2009

2 Comments

Filed under Uncategorized

Orange-Almond Blueberry Muffins

I’m so super-excited — I finally bought a copy of Country Wisdom & Know-How! In case you don’t know, it’s a collection of small booklets that were published during the 1970s, “during the ‘back to the land era’ when hippies were homesteading  and gas and energy prices were sky-high.” (Sound familiar?) Each booklet addressed some simple skill or piece of country know-how — this book covers everything from how to attract hummingbirds to making your own beer and wine, from drawing maple syrup to making milk soap, and everything in between. I seriously want to try to do everything in this book. Okay, maybe not killing and skinning a rabbit….And I don’t I don’t foresee myself breeding livestock anytime soon…but pretty much everything else I definitely want to do! There are also a ton of wonderful-sounding recipes in here, one of which inspired today’s blog entry.

When berries are in season I go through quarts of them every week. At this point in the summer I’m sure my husband’s starting to get sick of berry-somethings for breakfast every morning….Anyway, I had about three pints of blueberries in my refrigerator when I came across the recipe for Classic Blueberry Muffins in the book. I always like to modify things and make them my own so I first decided to add some nutmeg and shaved almonds to the recipe. Then I started thinking about how nothing enhances the flavor of blueberries more than cinnamon and orange. Berries and citrus are pretty much always outstanding together. Some pairings (Strawberry + Lime, Blackberry + Lemon, Grapefruit + Raspberry) go especially well together, but my favorite combination has to be blueberry and orange. The orange adds an edge and a brightness to the blueberry that is sublime. Yes, sublime…So by the time the muffins were done they had gone from Classic Blueberry to Orange-Almond…typical. I have included vegan alternatives in the recipe if you’d like to make an eggless, non-dairy version of these muffins. Either way, they’re delish!

Ingredients:

– 1 3/4 c. flour

– 1/2 c. sugar

– 1 Tbsp. baking powder

– 1/2 tsp. salt

– 1 tsp. cinnamon

– 1/2 tsp. nutmeg

– 4 Tbsp. butter or butter substitute like Earth Balance

– 1 egg, beaten, or 1/3 c. unsweetened applesauce

– 2/3 c. milk, or almond milk

– 1 tsp. vanilla extract

– 1 c. blueberries

– 1/4 c. shaved almonds

– 1 Tbsp. orange zest

Directions:

1. Preheat the oven to 375F

2. In a large bowl, mix your dry ingredients together — flour through nutmeg

3. Cut in the butter (substitute)

4. In a separate bowl, mix together the milk, egg, and vanilla (or almond milk, applesauce and vanilla)

5. Pour the wet ingredients into the dry. Stir until just moistened

6. Gently fold in the blueberries, almonds, and orange zest

7. Fill greased muffin tins (recipe makes 12 medium-sized muffins)

8. Bake for 20 minutes at 375F, or until a toothpick or a knife inserted into the center comes out clean

9. Cool and remove from muffin tin. Enjoy!

1 Comment

Filed under Uncategorized

How to Make Paper at Home

Yep, you read that correctly: today’s project is homemade paper! Ambitious, I know…Let me say, first of all, that this is definitely a lot easier than you would think, but admittedly does take a bit of practice to get really good at. But hey, it’s fun even while you’re getting the hang of it, and how many people do you know who make their own paper? Not too many I’d bet….Homemade paper makes a terrific gift and you can personalize it any way you like to make your very own super-unique signature stationary — dried flower petals, perfumes, leaves, bits of string, even dryer lint can be added to your paper to make something totally beautiful and totally you. Best of all, making your own paper requires no special equipment (a blender is all you need) and uses items which you most likely already have at home — the only thing I had to buy was panty hose!
Aside from being a fun and rewarding activity, making your own paper is also a great way to recycle. You can use whatever paper you have lying around — old newspapers, used wrapping or tissue paper, junk mail, construction paper, old receipts — turn your trash into something useful and gorgeous!

What You’ll Need:

– Whatever paper(s) you’d like to use
– A large bowl
– A blender
– Glue (just regular school glue like Elmer’s)
– Panty Hose
– Wire Hangers
– Something to plug your sink with
– Whatever you’d like to add to your paper (leaves, string, etc)
– Perfume or essential oil if you want scented paper
– Sunshine

Directions:

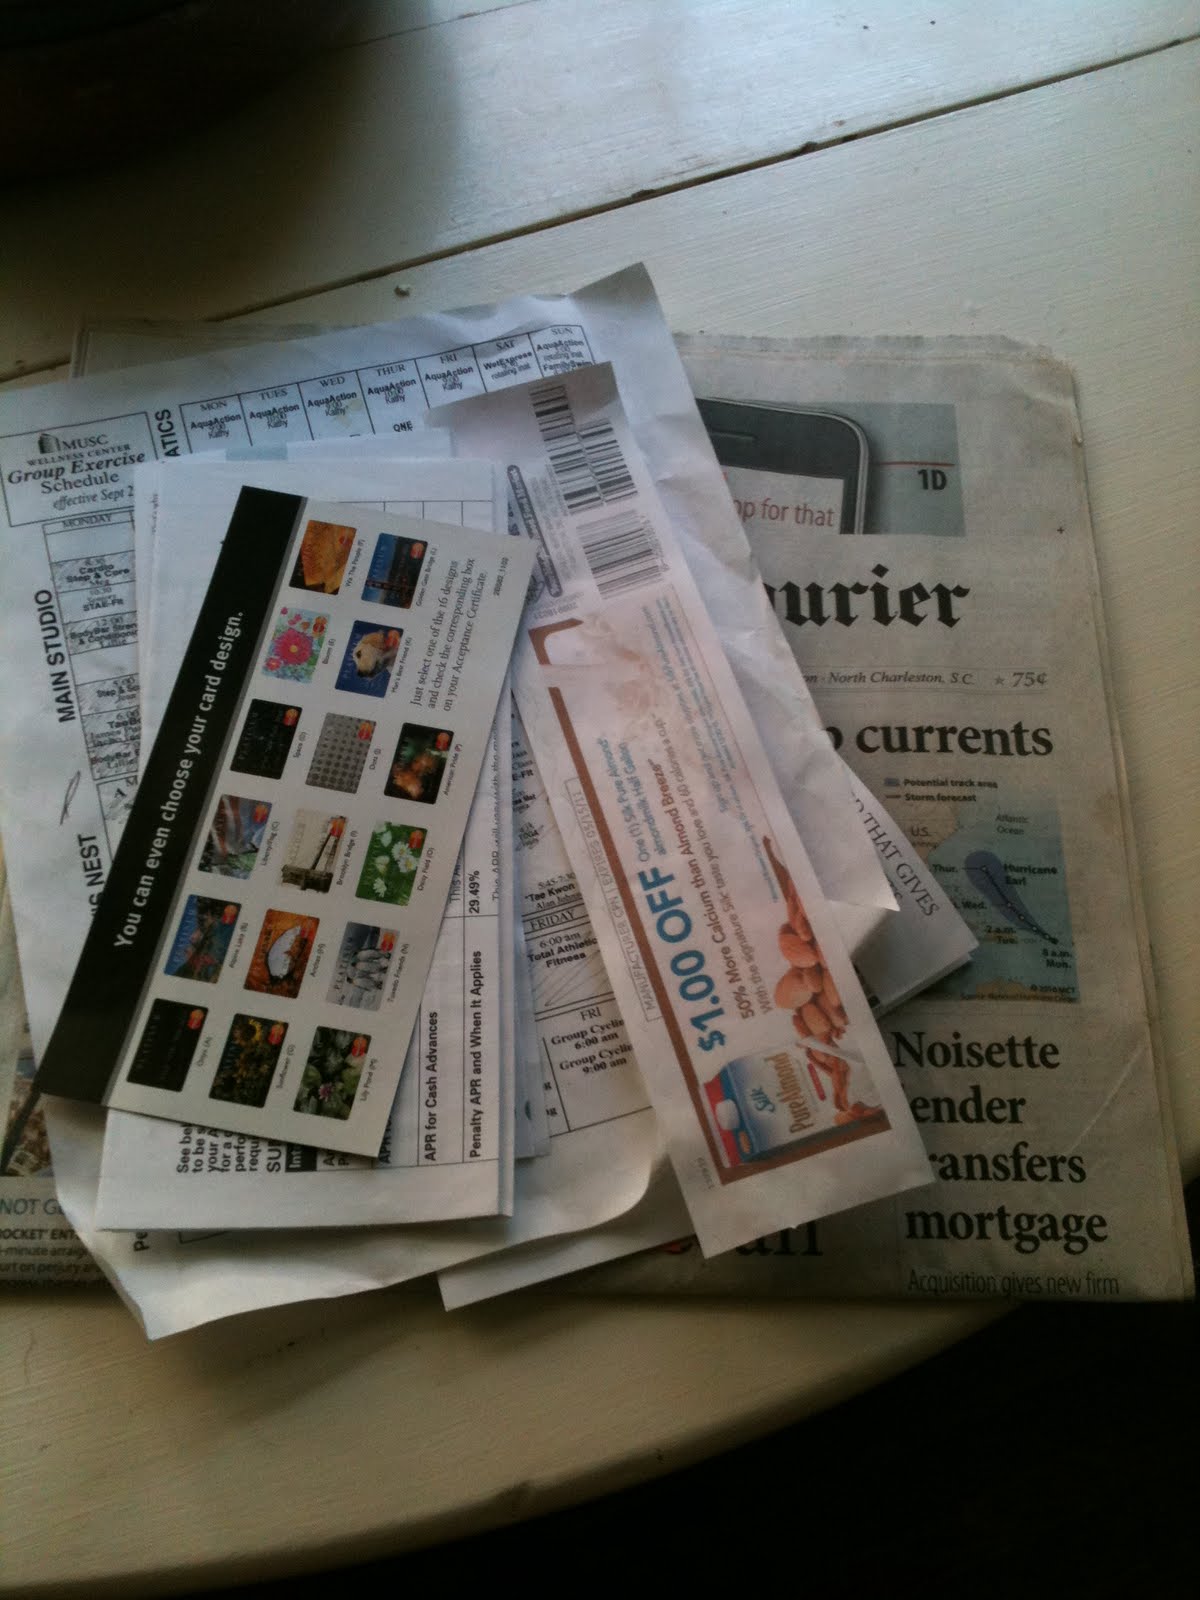
1. Assemble the paper you’d like to use. (As a general rule, every 1 cup of loosely packed paper pieces yields one sheet.) I used a combination of newspaper, junk mail, and expired coupons:

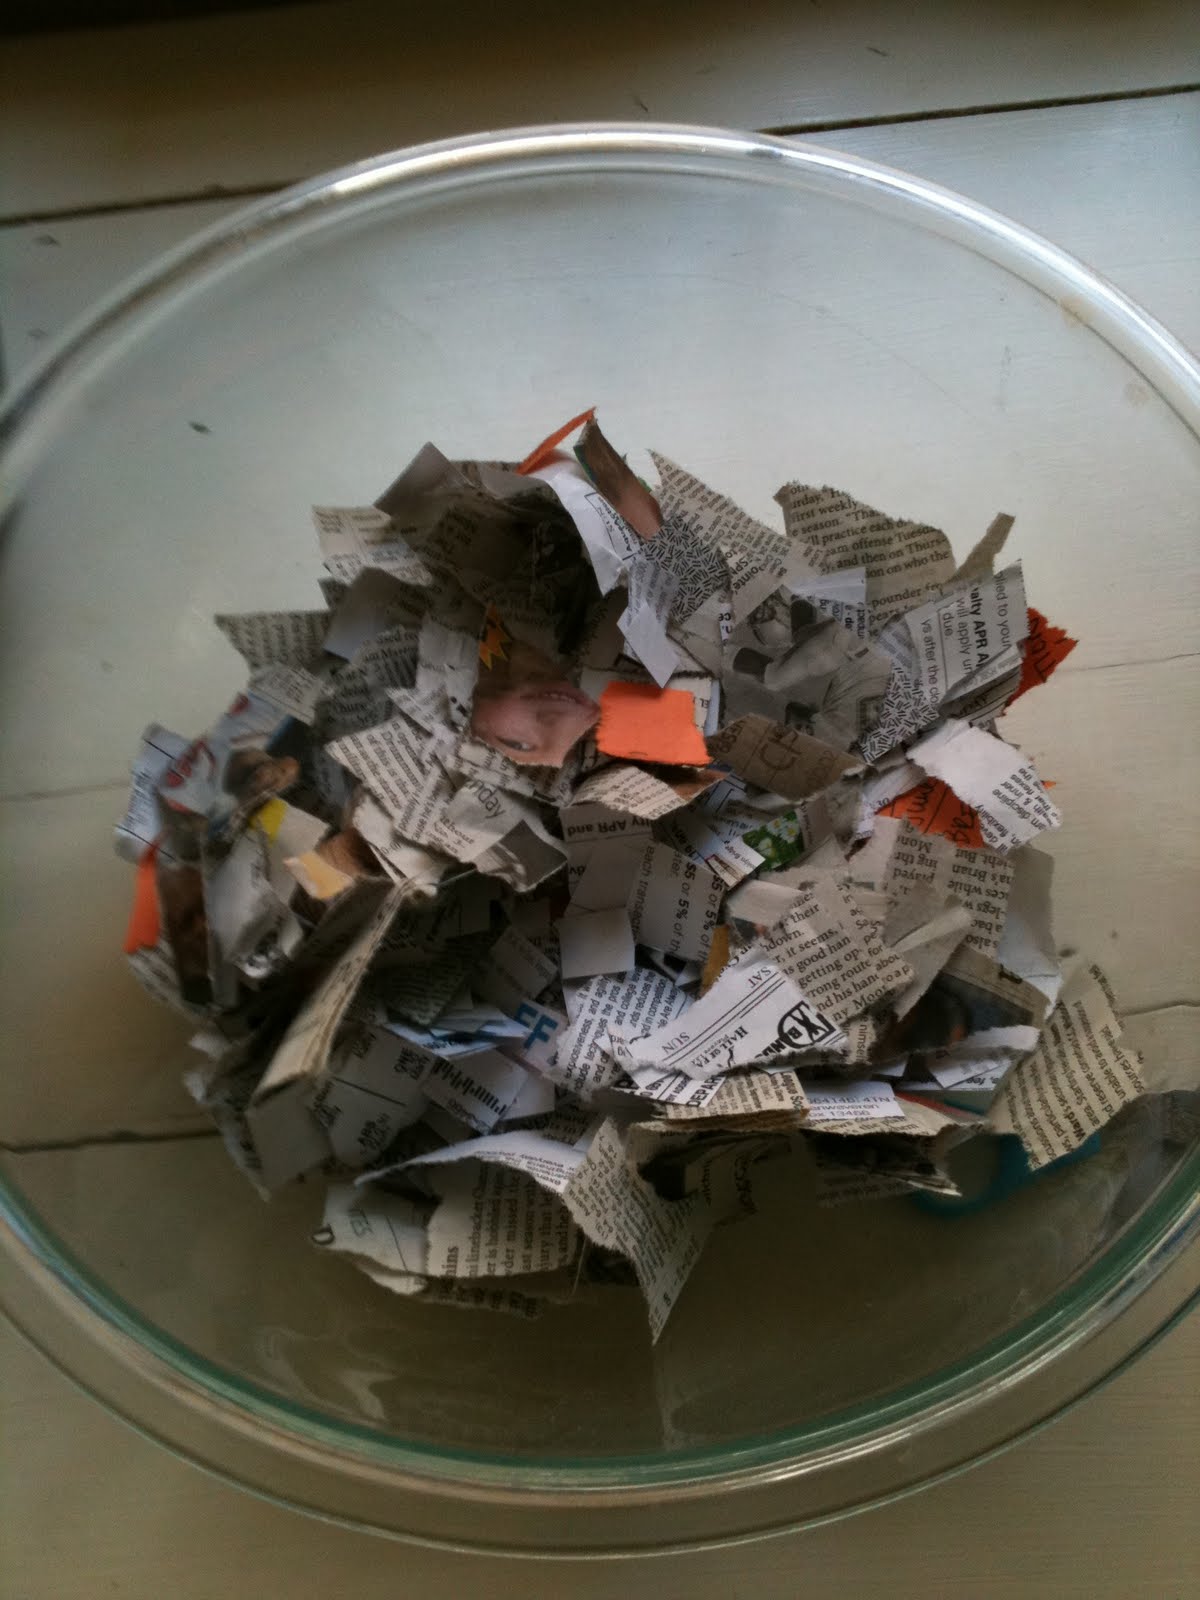
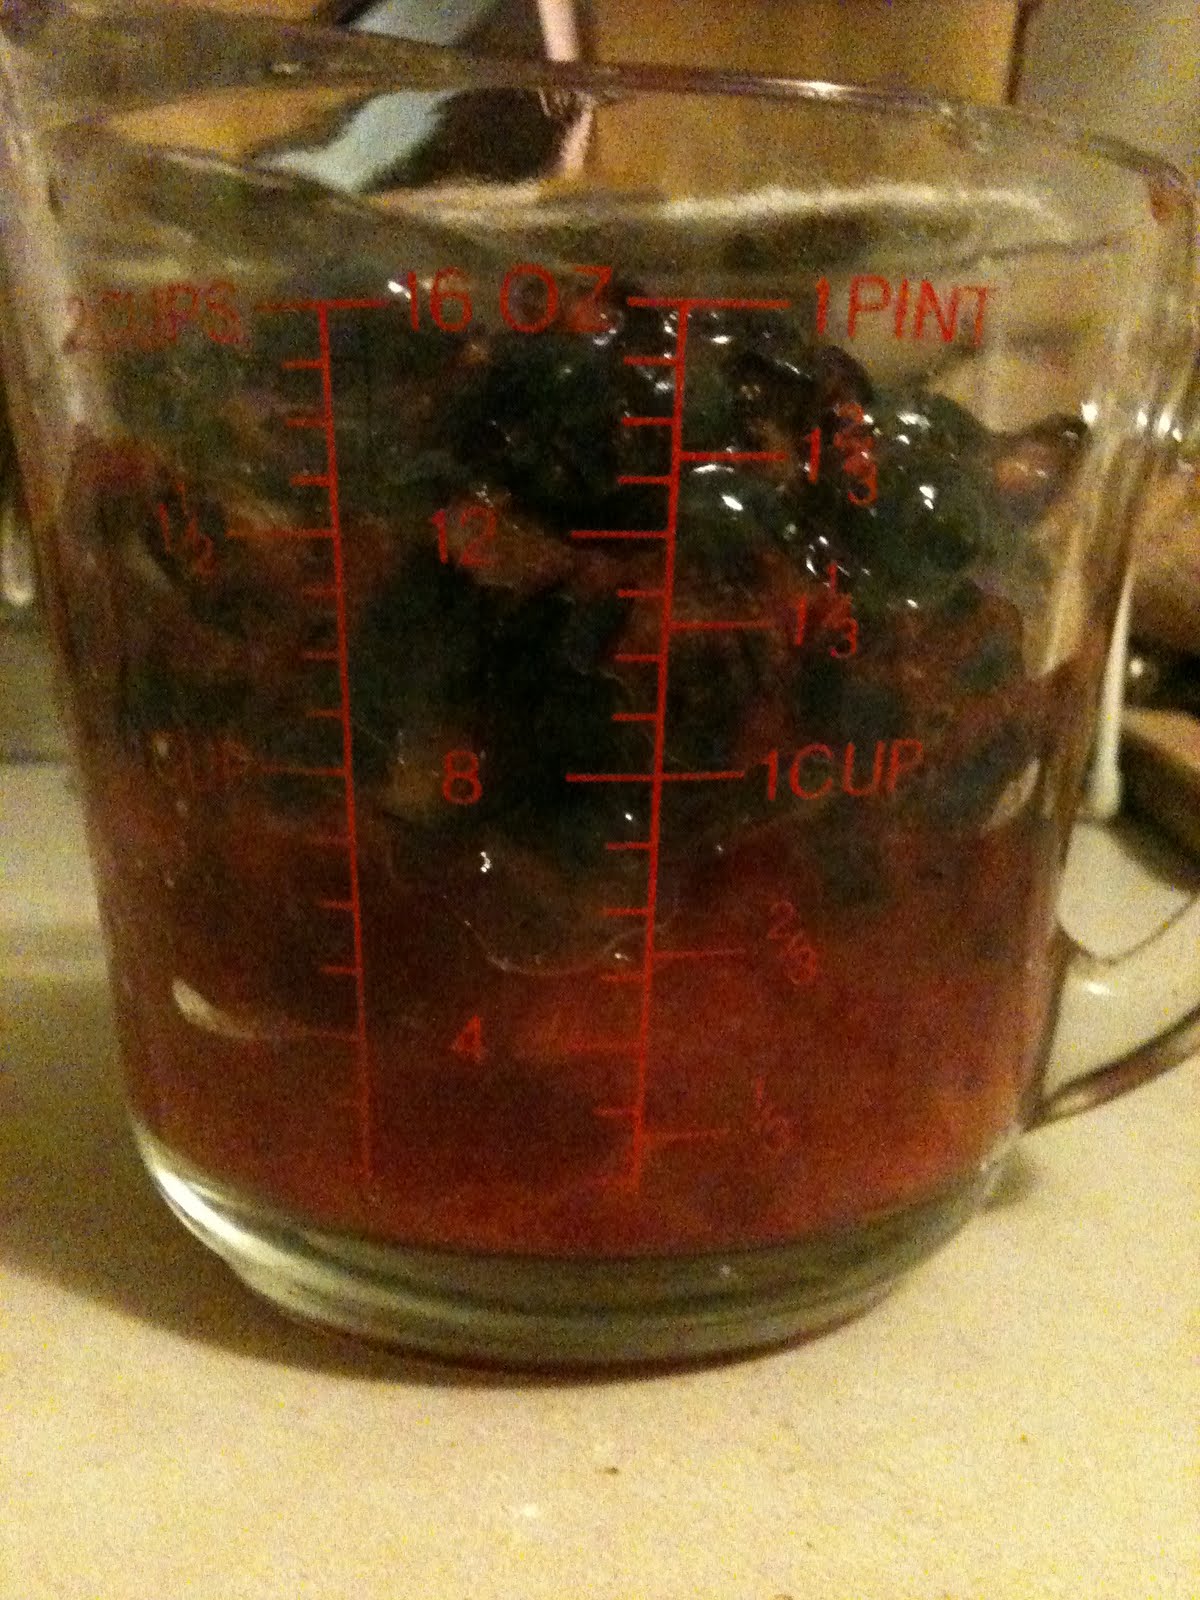
2. Tear up your paper into small pieces, approximately one inch square. The larger the pieces the longer they will have to soak before you can work will them. Also, thinner, cheaper papers like newspaper and tissue will take less time to soften and break down than printer paper or card stock. Measure your paper pieces and place in a heat proof bowl:

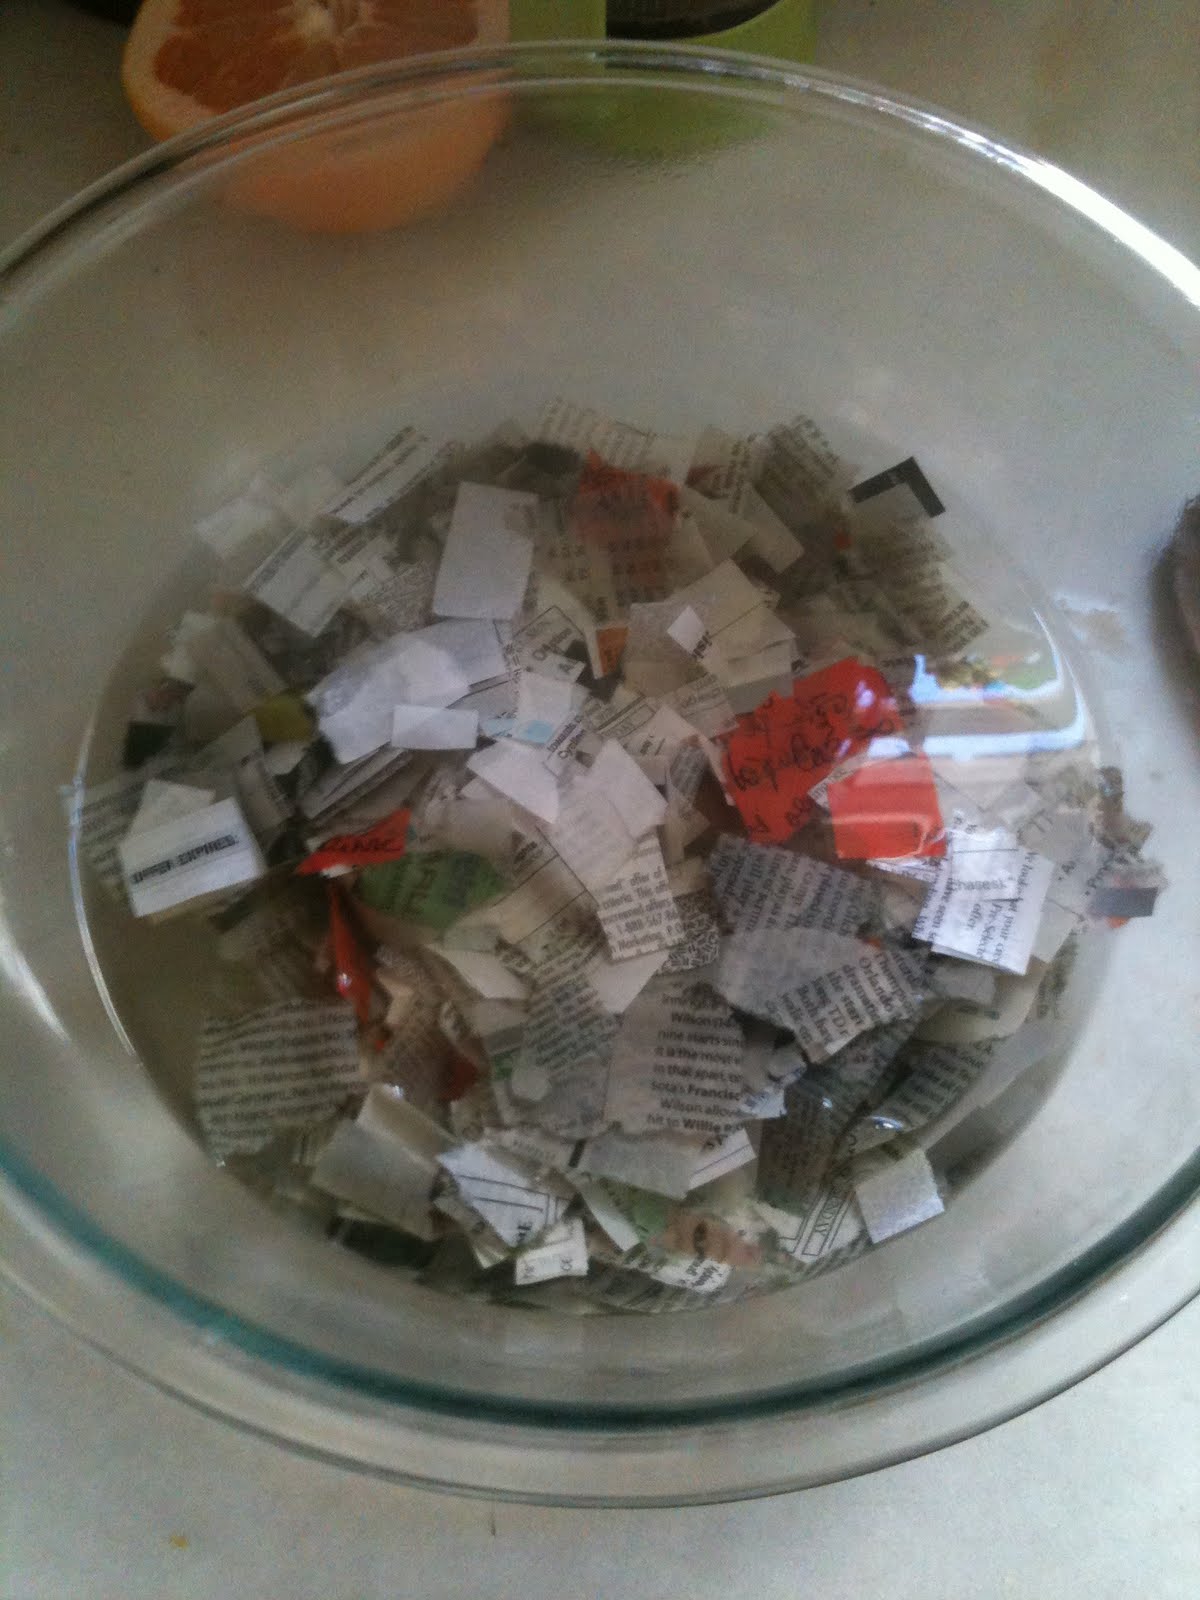
3. Boil an amount of water equal to the amount of paper you’re using. For example, I started with 2 cups of torn paper so I used 2 cups of boiling water which yielded two 7in x 9in sheets of paper. Pour boiling water into bowl with paper pieces:

4. Let paper sit in hot water for 2 or more hours. Meanwhile, it’s time to begin making your screens!

5. First, figure out how many screens you will need. As I said, I was using 2 cups of paper, anticipating a 2 sheet yield, so I made two screens. If you are using three cups of torn paper, you will want to make three screens, and so on….

6. Shape coat hangers into rectangles or squares. You could also use empty picture frames with the glass and back removed or something similar, but coat hangers are cheap and readily available.

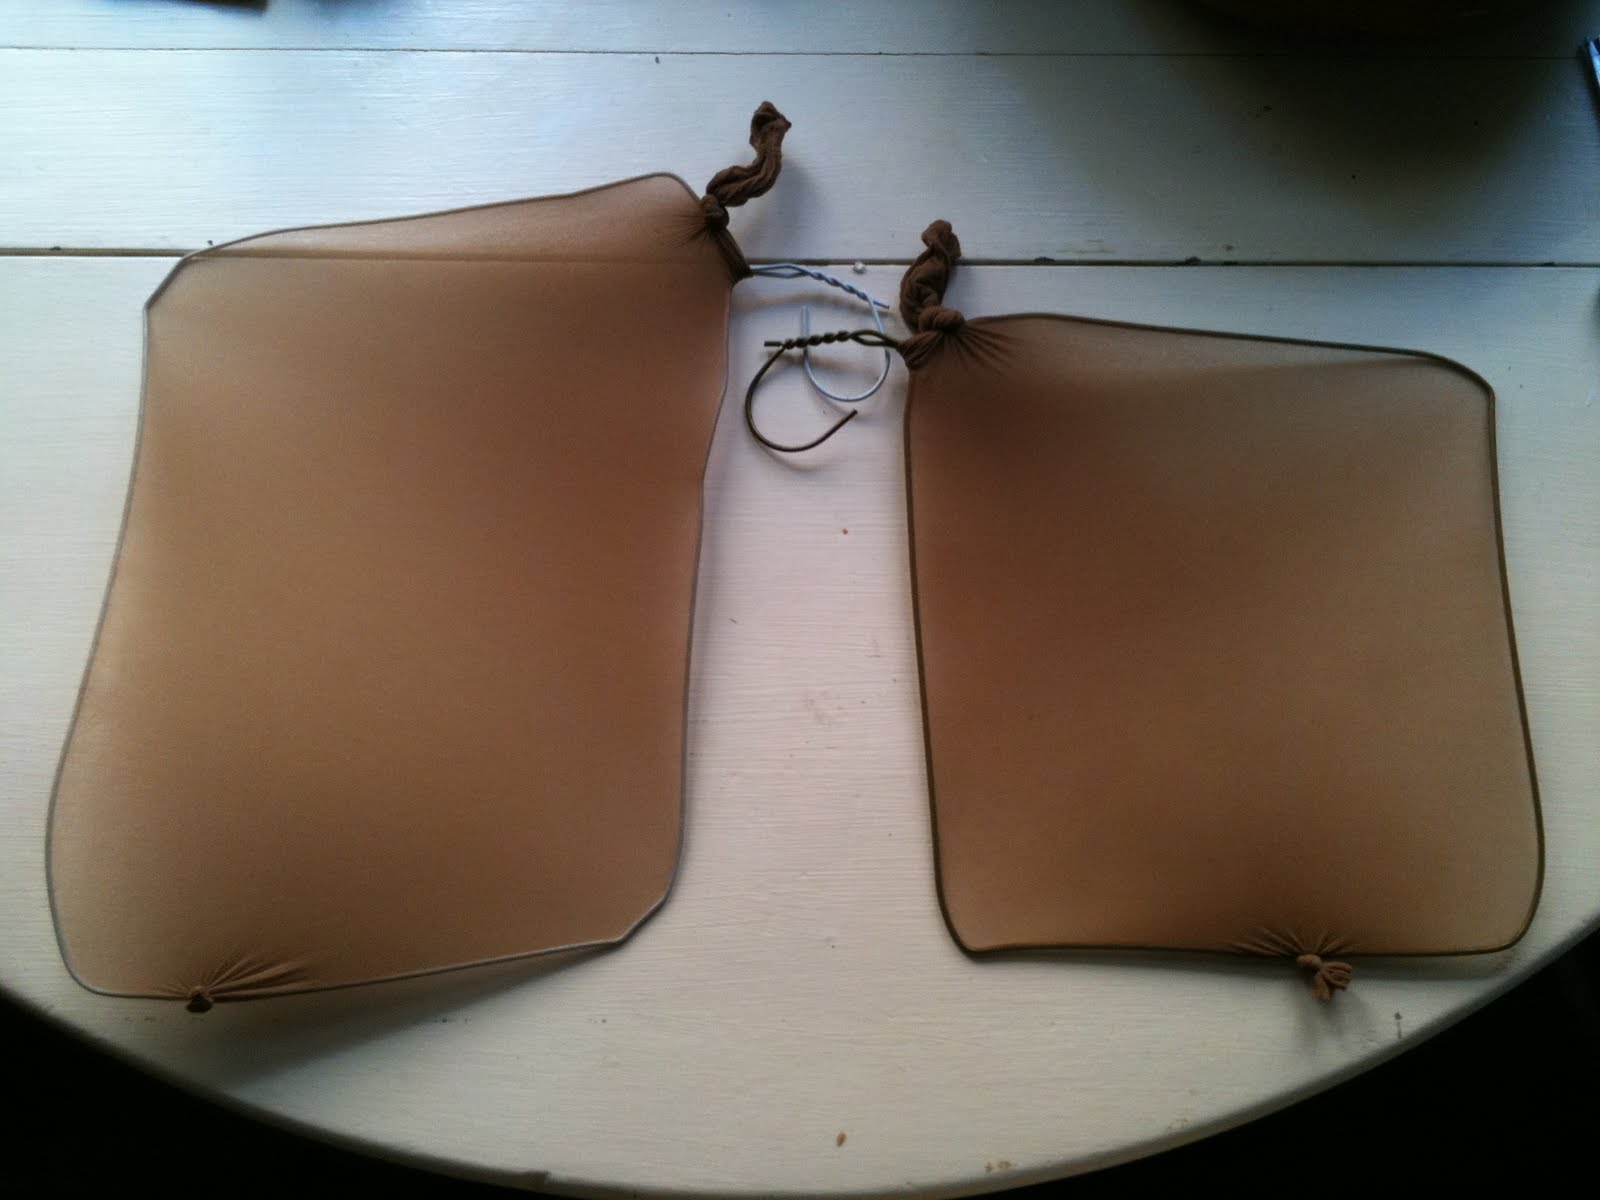
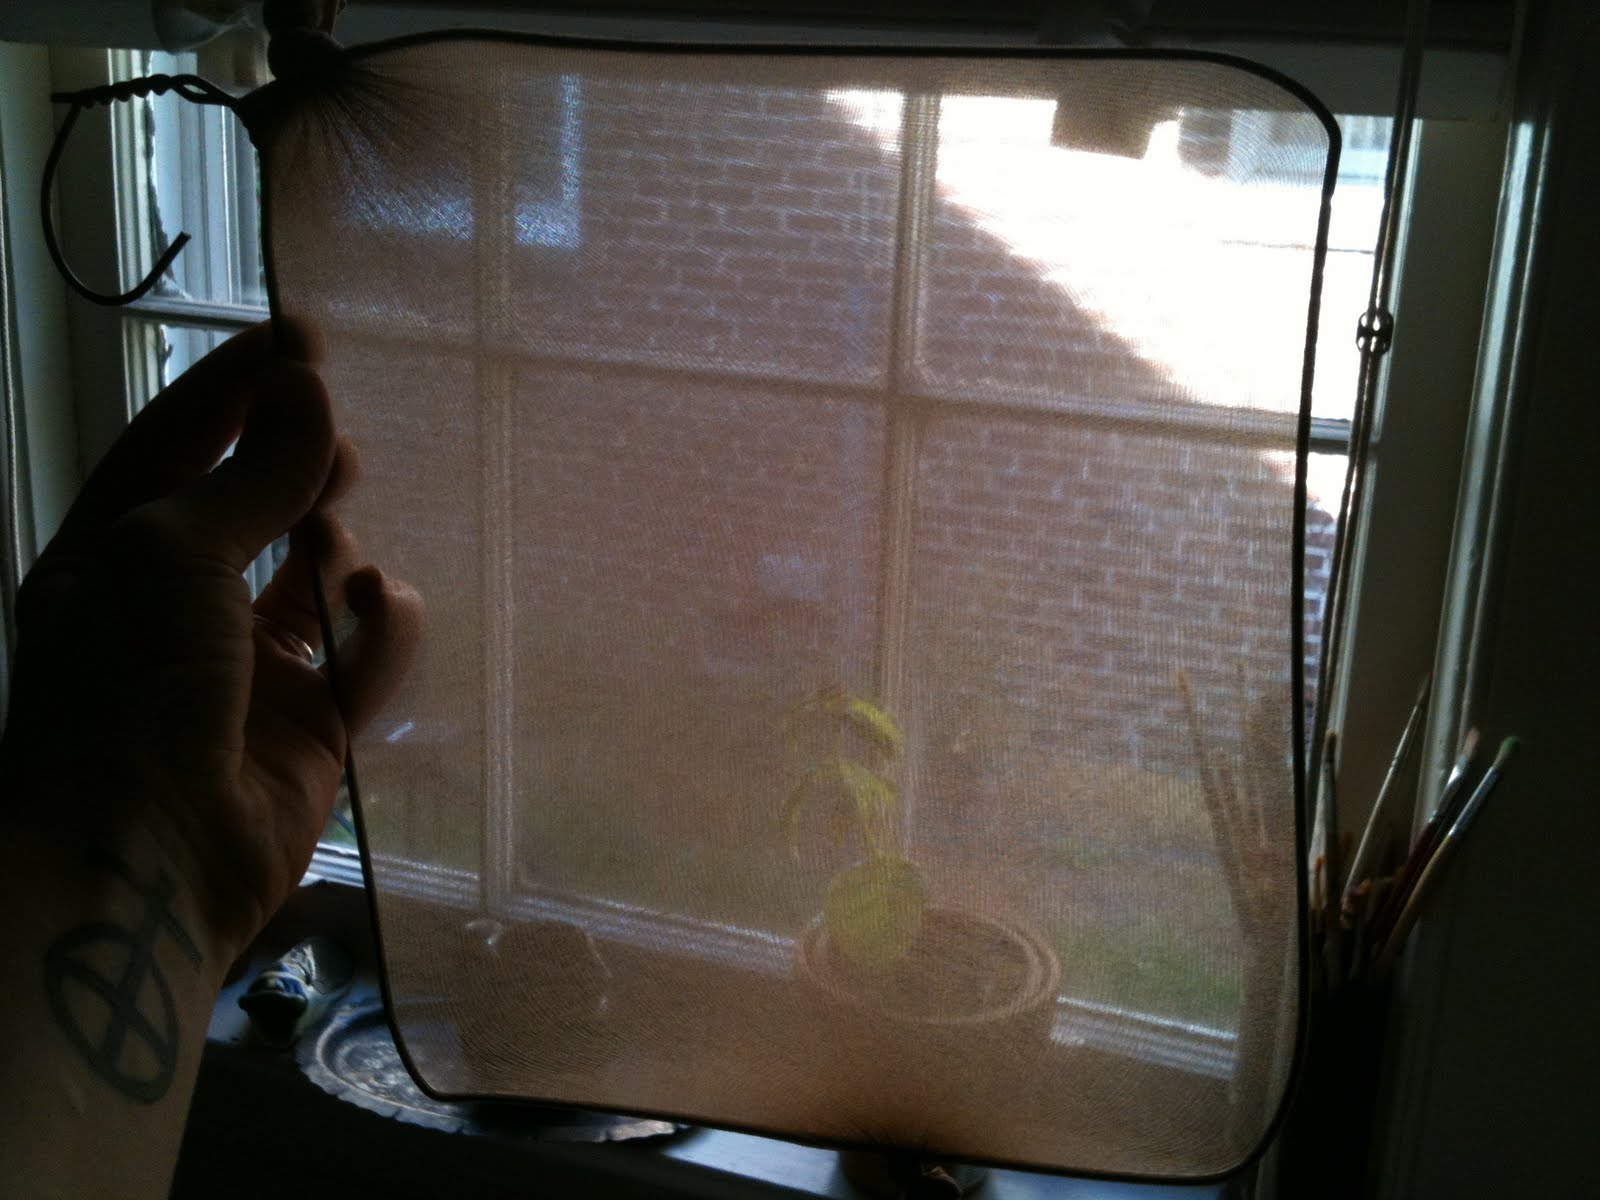
7. Stretch panty hose over hangers, being careful not to tear them or create a run. Cut and tie so that hose are fairly taut and you have a sturdy screen:

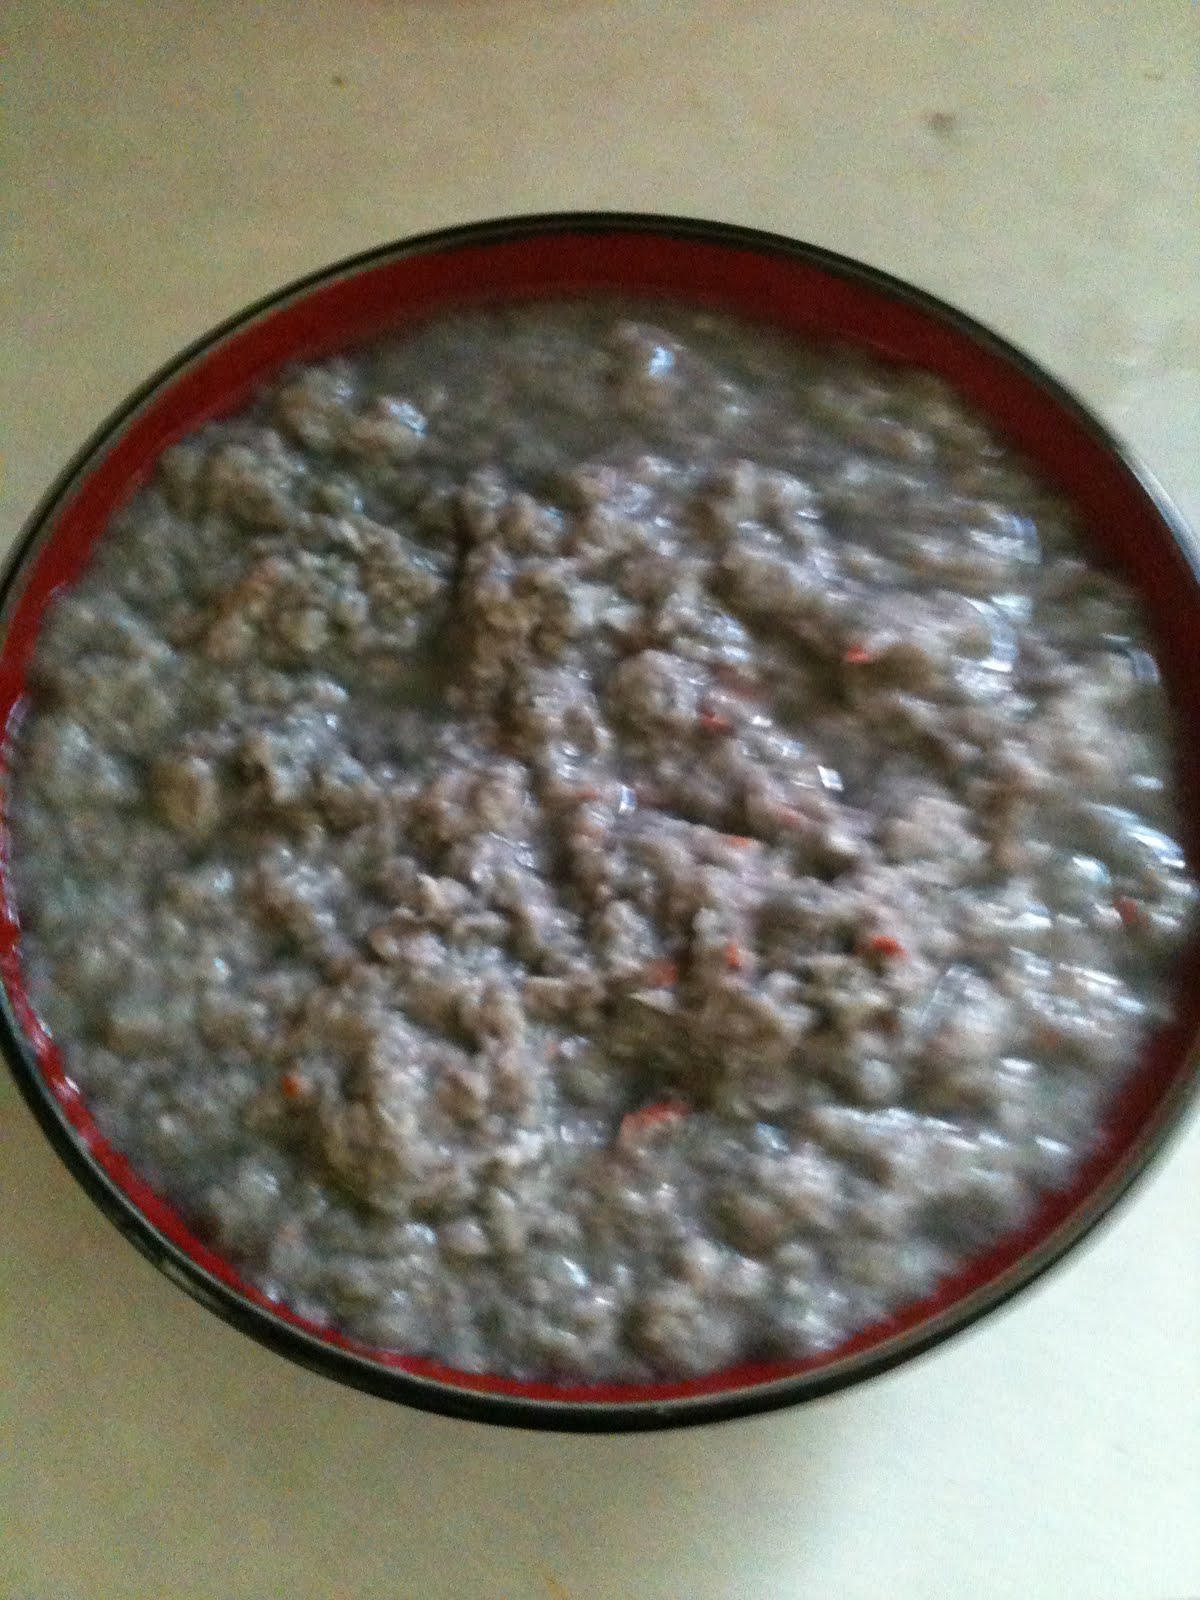
8. Now that your screens are done you can return your attention to that paper! Once the pieces have soaked in water for a couple of hours (you can also help accelerate this process if you are getting impatient by tearing up the pieces into smaller bits with your hands) they should be broken down enough to blend. Add about a cup of the water/paper mixture to the blender at a time and pulse, adding more water if necessary. Keep in mind though that the more watery your paper pulp the thinner and more difficult your sheets of paper will be to work with.

9. Now you can add whatever you’d like to your pulp. I added dried rose and hydrangea petals, lavender, and rose oil. Mix well.

10. Fill your kitchen sink with about four inches of tepid water. As water is running add glue (about 4 tablespoons of glue per 2 cups of paper, but this does not have to be precise — you can eyeball it)

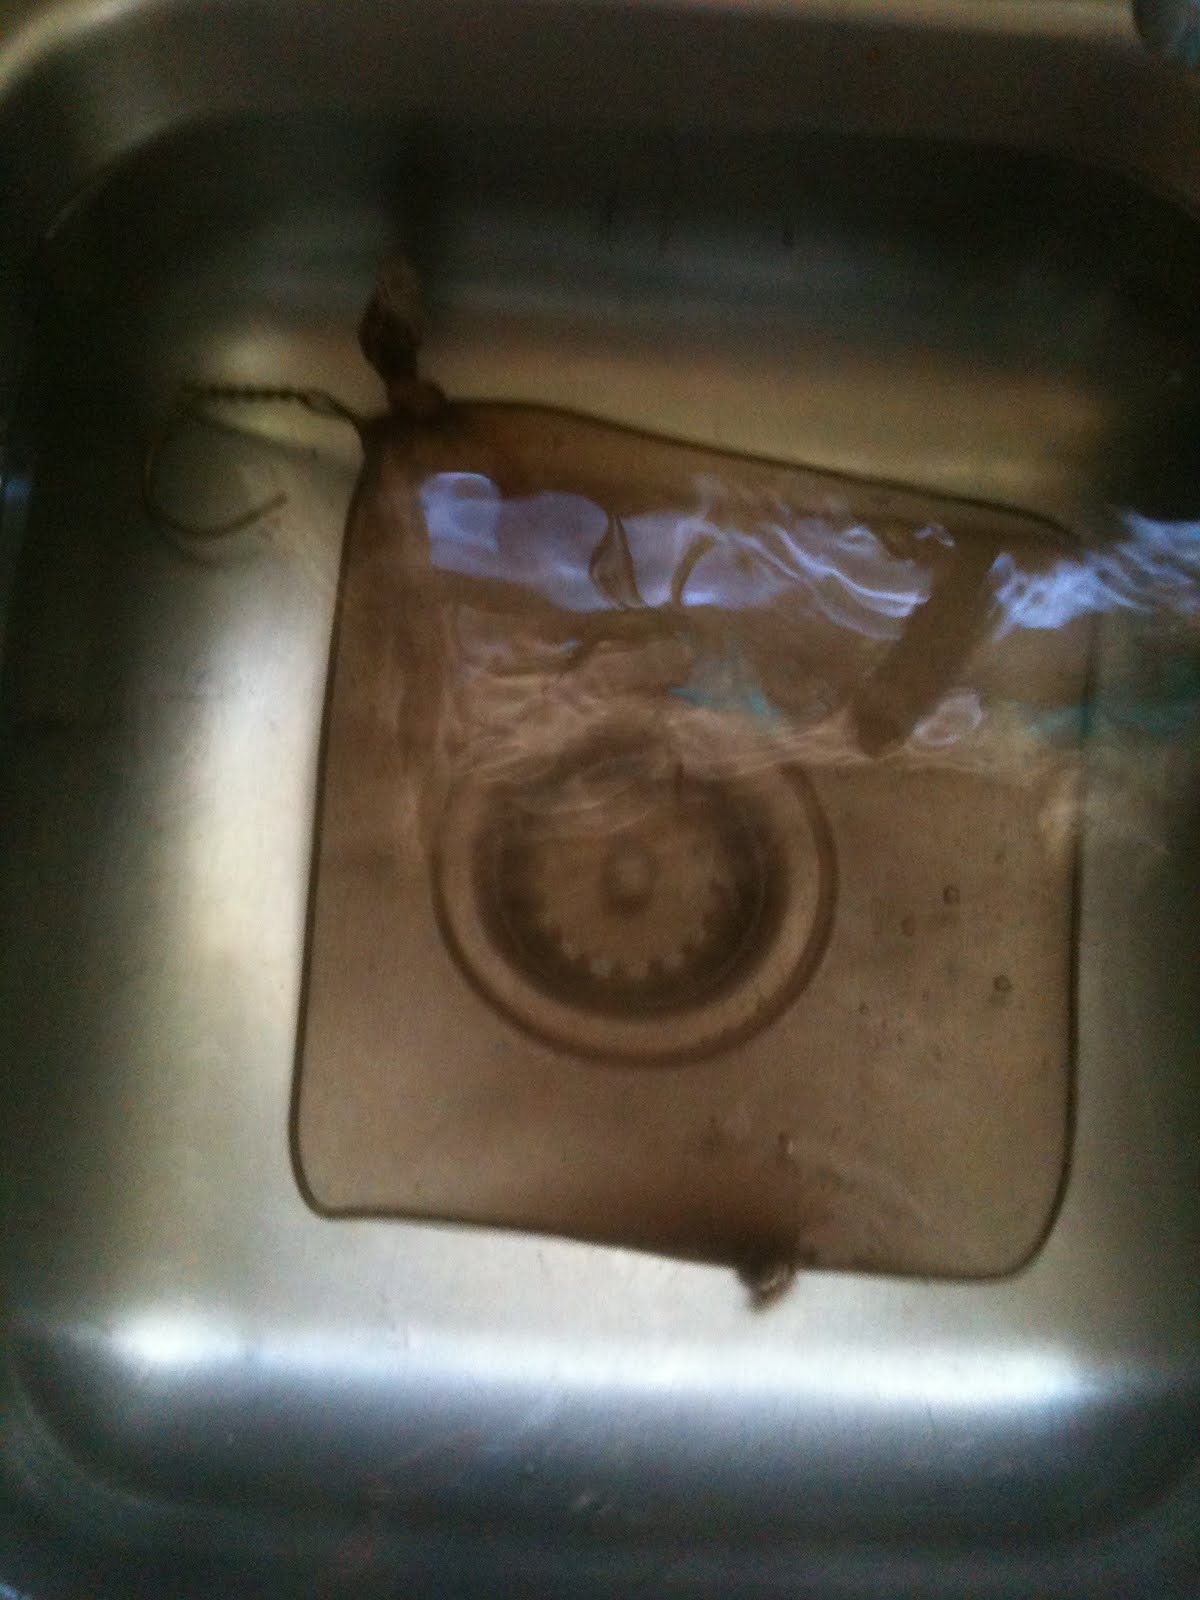
11. Press your first screen to the bottom of the sink

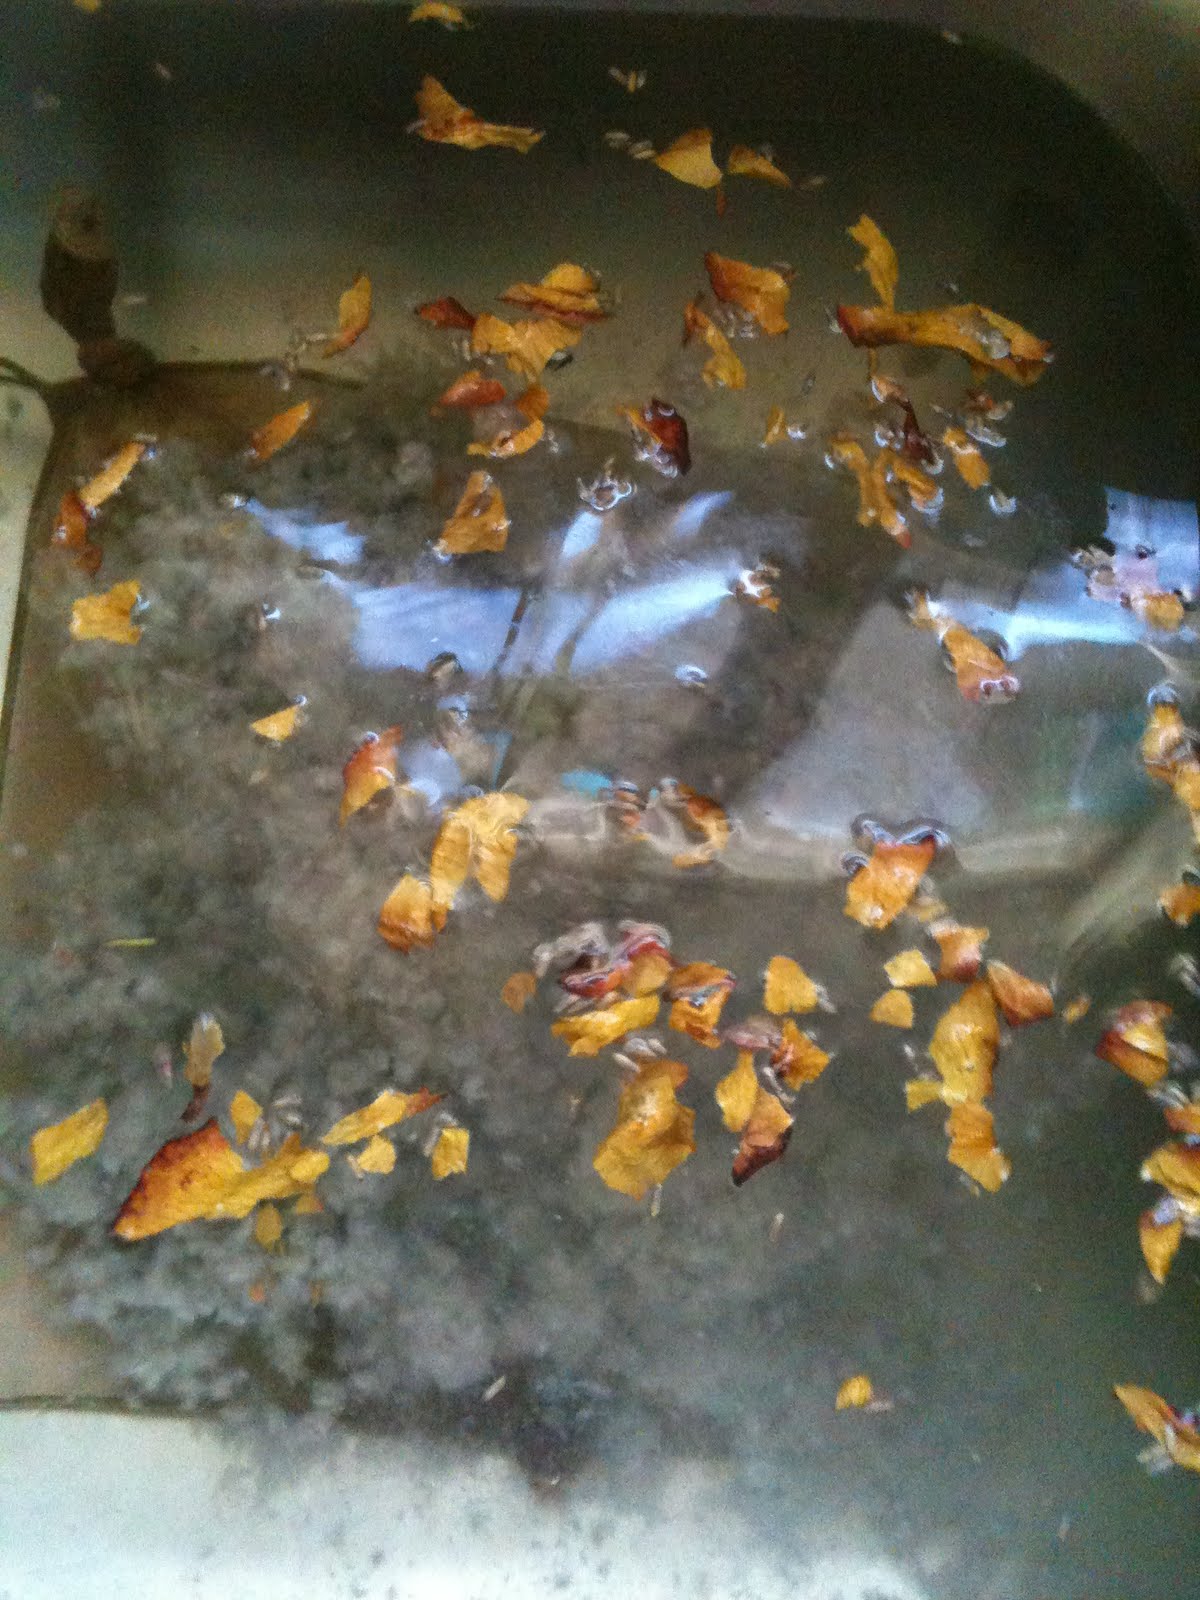
12. Spoon a portion of your paper pulp over the screen until covered and let settle:

13. Very slowly lift your screen up out of the water, try for 45-60 seconds from sink bottom to water surface, if you can.

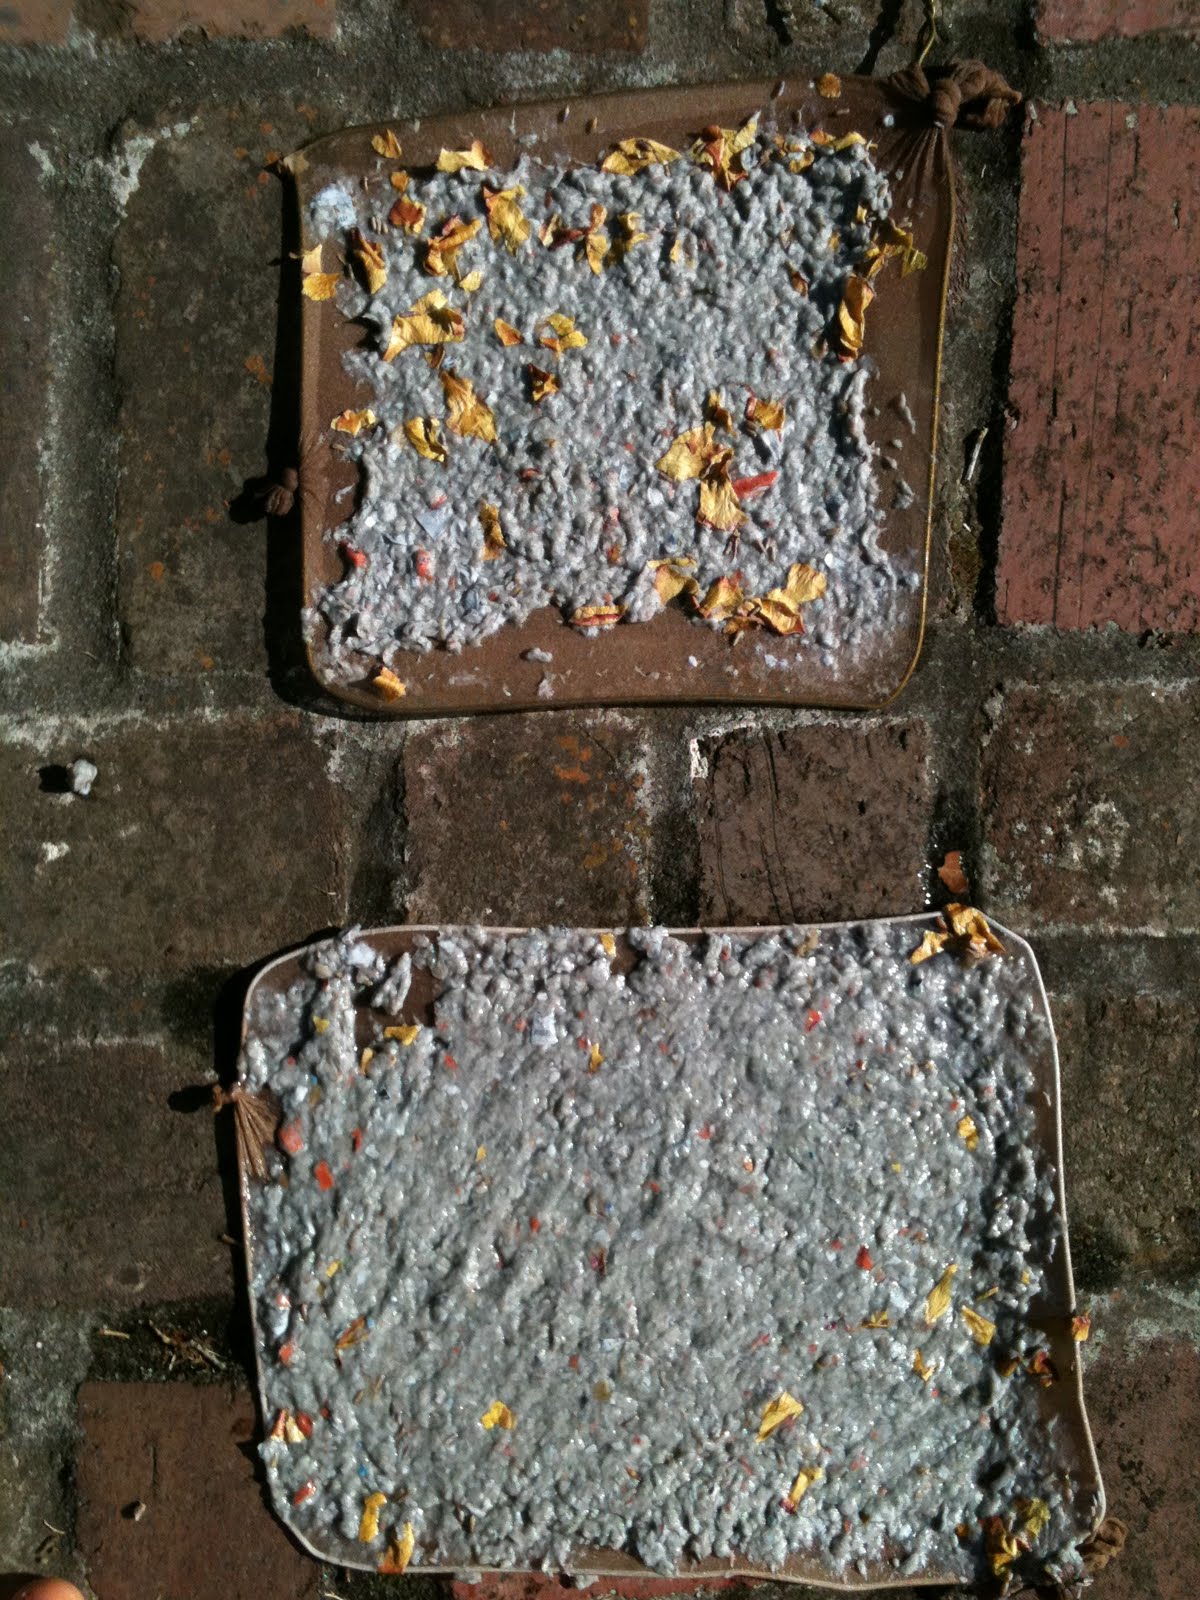
14. Set somewhere flat and sunny to let dry:

15. Repeat steps 11-14 for remaining screens. You may have to drain and refill your sink if the water becomes too murky

16. Let paper dry completely. How long it takes will depend upon the thickness of your paper. I put my screens out in late-afternoon, left them out overnight, and then let them sit and soak up the first few hours of morning sun too, just to be safe.

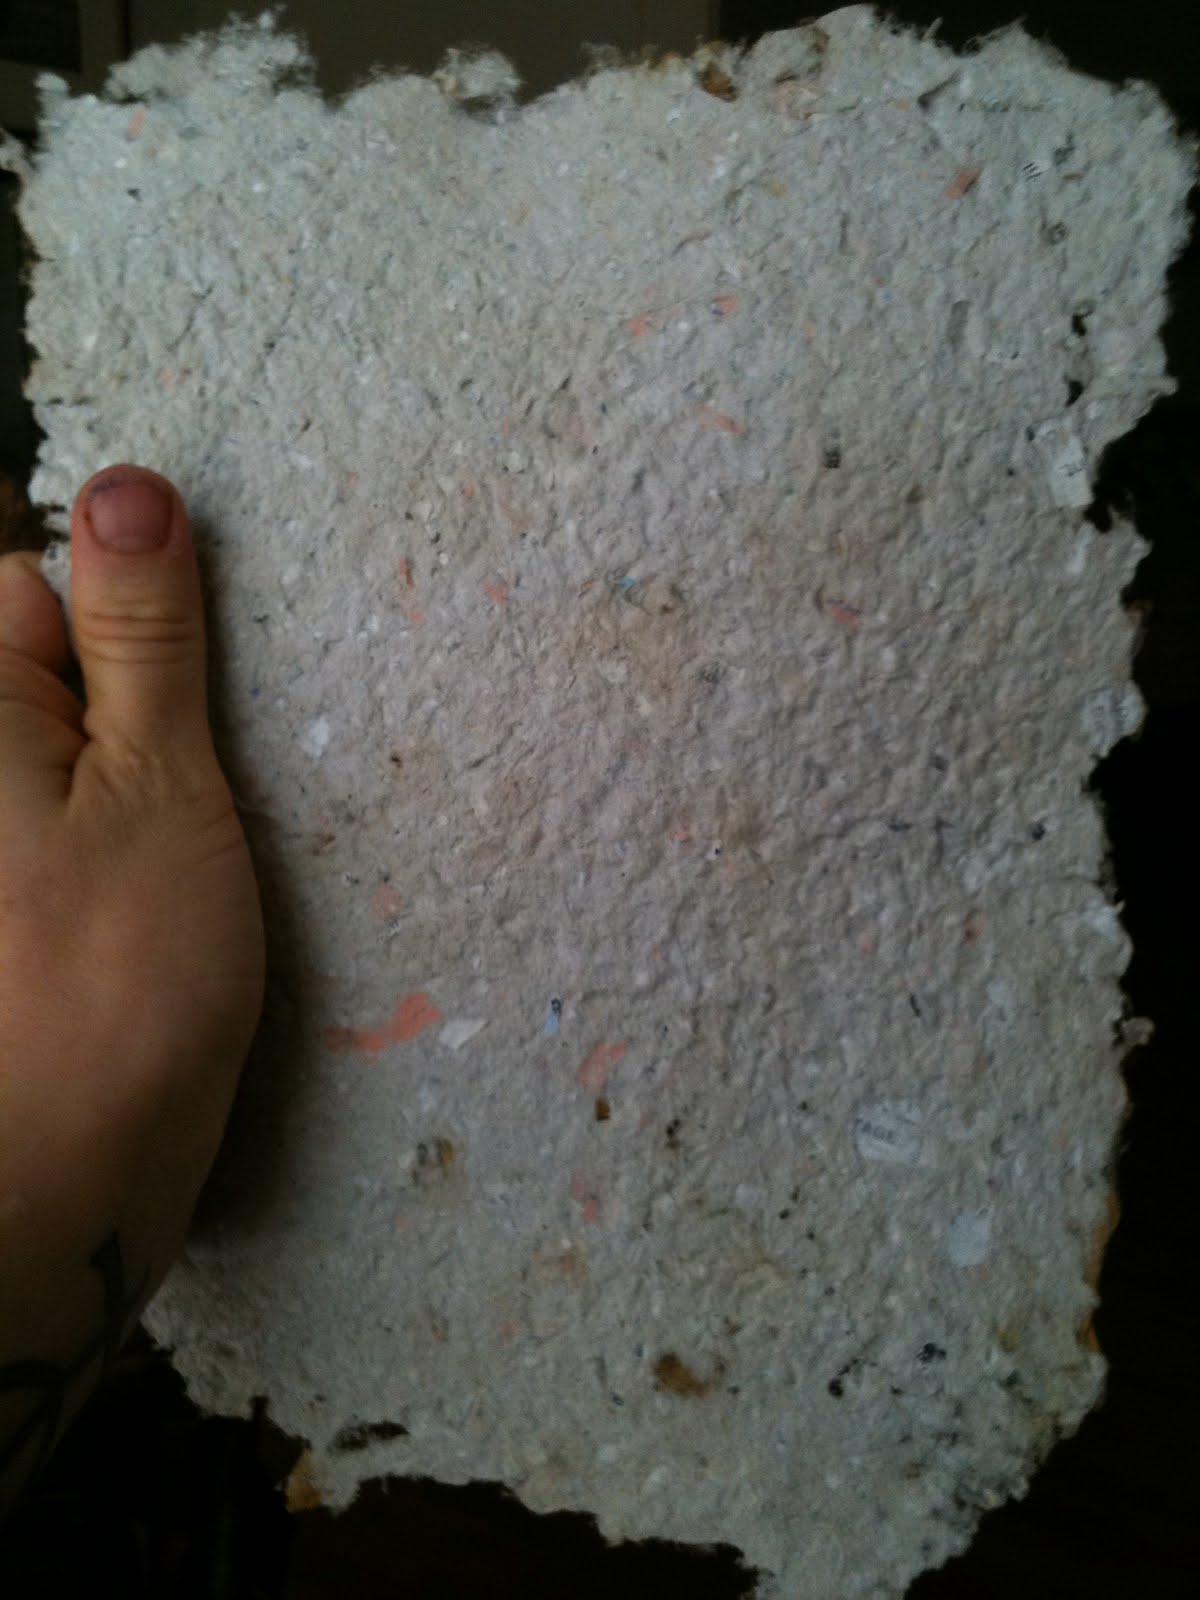
17. Slowly peel paper from screens

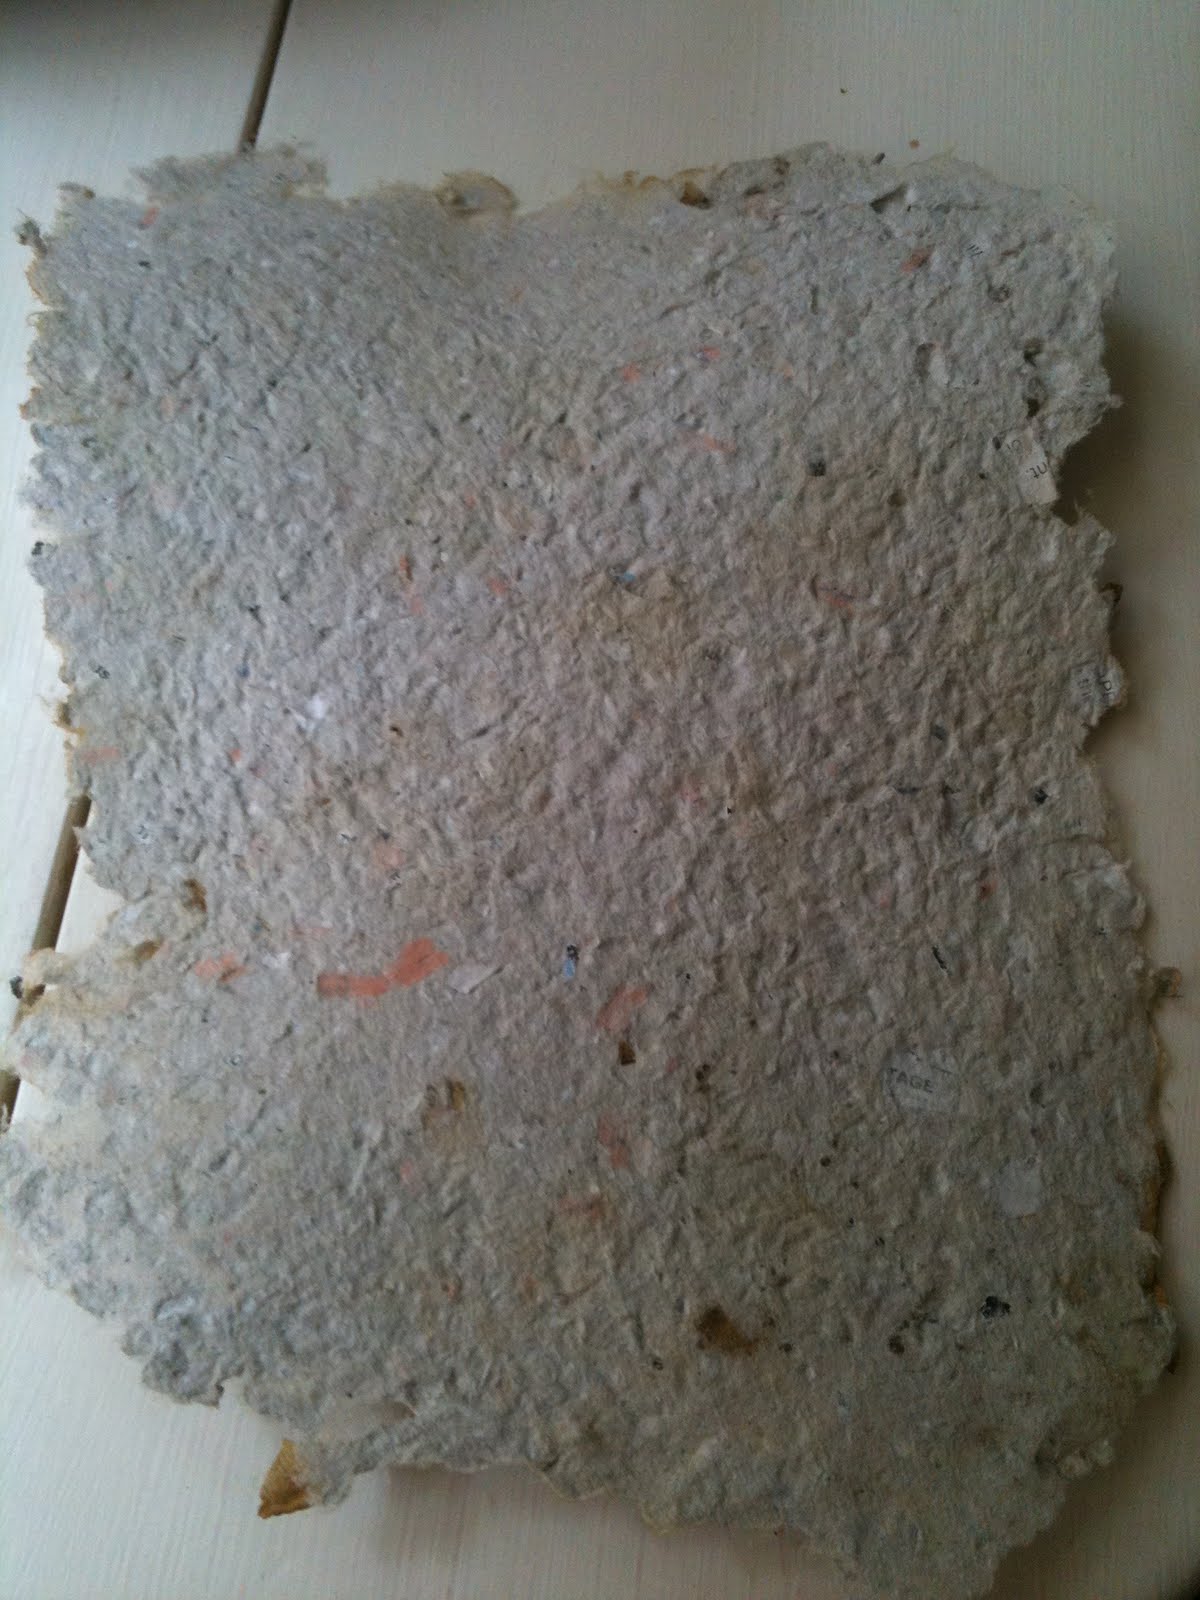
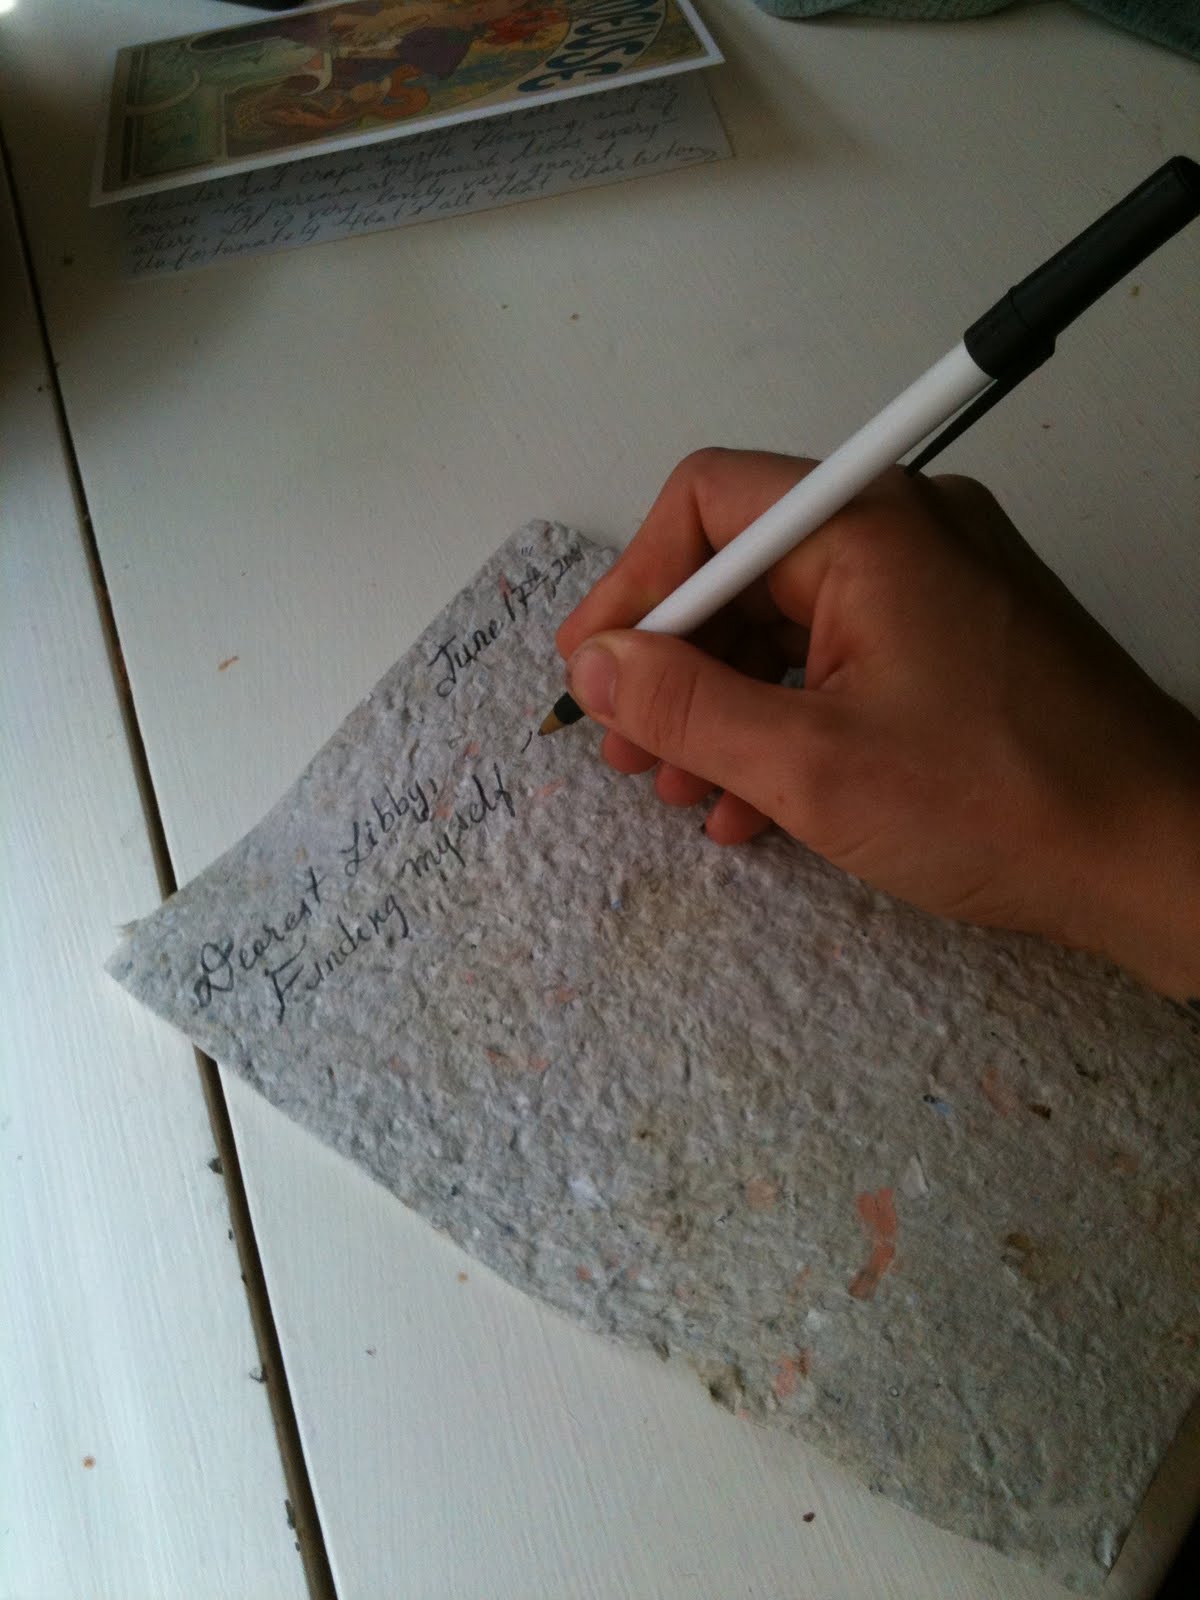
18. Trim edges if you like (a matter of aesthetic preference), and you’re ready to write! How cool is that?!

* My paper smelled AMAZING but I used rose petals that were yellow with red tips and after the hours in the sun the yellow parts of the petals turned a rather unpleasant shade of brown. My suggestion is that if you’re going to use flower petals use ones at the darker end of the color spectrum.

1 Comment

Filed under Uncategorized

Sweet Plum and Blueberry Jam: How to Make Jams

Plums always remind me of me childhood. I grew up in central California where we had several fruit trees growing around our house — lime, dwarf apple, orange, lemon… but my favorite was the plum tree in our front yard. It was the perfect size to climb, and I loved to swing on its branches. I eagerly awaited the appearance of the tiny fruits each May and tore them down greedily, often before they even had the chance to ripen; chewing the sour flesh, spitting their tiny pits as far as I could….I love how such small things can transport you: how smells (for me; eucalyptus, black pepper, chlorine, horse manure), or sounds (wind chimes, steel guitar), or flavors (black walnut, wild licorice, sour plum) can take you instantly back to some shadowed, half-forgotten piece of childhood…..Anyway, I still look forward to eating plums this time of year — even if I must buy them from the market instead of plucking them from the boughs of my own fragrant and sun-filled tree…

This recipe is for a small batch of jam, but you could certainly multiply the measurements to make larger quantities. Similarly, the plums and blueberries could be replaced here with any kind of berry, cherries, currants, any stone fruit, pears — even mangoes or kiwis! Get creative and make something wonderful!

Ingredients:

– 1 cup of peeled, sliced, and pitted plums (about 1 lb. whole)
– 1 pint blueberries
– 1/2 cup honey or 1 cup sugar
– 1 Tbsp. any unsweetened citrus juice (I used grapefruit juice this time)
– 3 Tbsp. water
– 1 tsp. fruit pectin*

*Pectin is a thickening agent, usually extracted from citrus fruits or apples and is available in many grocery stores and most health food stores.

Directions:

1. Select the jar you wish to put your jam in. It can be a mason jar, or an old pickle or jelly jar — whatever you have available. This recipe will yield about 16 oz. of jam, so you do want whatever jar you choose for this to be pint-sized.

2. Wash and rinse your jar; let stand in hot water. Meanwhile, boil your lid and ring in a large pot to sanitize. Let stand in hot water also.

3.  Peel, pit, and slice plums, make sure to catch as much juice from the plums as you can

4. Place blueberries in a bowl and mash using a pestle, or any other blunt kitchen instrument. (Tip: Mash blueberries a bit at a time: it’s much easier than trying to mash them all at once, and this way you can ensure that you mash the proper amount according to how much fruit and juice your plums wind up yielding)

5. Combine fruits, making sure that you have at least 2 cups of fruit and juice

6. Put fruit into a saucepan with citrus juice and water and cook at medium heat, stirring frequently. Bring to a boil

7. Measure out honey or sugar; thoroughly mix pectin into sweetener

8. Add pectin-sweetener mixture to boiling fruit. Stir vigorously for 2 minutes to dissolve the pectin.

9. Return to a boil and remove from heat

10. Remove your jar lid and ring from your large pot and return water to a boil

11. While waiting for water to boil fill your jar to 1/4” of top and wipe clean

12. Screw on lid (with ring) tightly. Place jar into boiling water to cover. Boil for 10 minutes.

13. Remove jar (carefully!) from water. Let cool. Check seal — lid should be sucked down/un-popped.

14. Label and enjoy! Jam should last about 3 weeks once opened.

I’ve never claimed to be a patient woman…I decided to try my jam for breakfast the next morning. Here’s what it looked like when I opened it:

I spread it on a couple of pieces of coconut-oatmeal bread (recipe to follow shortly) and it was absolutely heavenly — soooo much better than Smucker’s or any of those other store-bought brands! Hey, I’ve never claimed to be humble either…..:)

1 Comment

Filed under Uncategorized