Tag Archives: non-toxic

How to Make Your Own Shampoo

I’ve been wanting to try making my own shampoo for a while now: finally the monster pump bottle we had been using for what seems like the past year ran out! As much as I like to try to make everything from scratch, with an increasingly mobile almost-one-year-old wobbling every which way around the house, I was definitely not going to be messing around with lye. That’s just me though, if you want to mess around with the hard stuff, I commend you, and here’s a link to get you started. So, I guess you could say this is the cheater’s version of homemade shampoo….

Cheater’s version or not, making shampoo this way is not only better for you (no chemicals), and better for the environment, but it’s fun too! Plus, you can customize your shampoo to make your very own scent — at the end of this post I’ll include some information on aromatherapy, but you can use anything from cooking extracts, to tea bags, to citrus peels and slices of fruit, to dried herbs and spices. Or, you can get creative combining essential oils — health food stores usually have a wide variety to choose from. I made one bottle of peppermint shampoo for daytime use, and one bottle of calming, nighttime shampoo with lavender, chamomile, and rose oil. (Both are baby-friendly too!)

As far as cost goes, you’re probably not saving that much money in all honesty, depending on which shampoo you usually buy. I mean, you can’t really beat a bottle of VO5 for $0.99 price-wise….But I’m going to assume that you’re reading this page because, like me, you don’t want to be lathering your hair with chemicals, and maybe also enjoy the process of making things yourself and breaking dependence on large corporations…. In that case, here’s the cost breakdown: I purchased one 32 ounce bottle of unscented liquid castile soap (this can also be used for making laundry detergent, by the way…) for $10, which seems to be about average price-wise.

If I use this castile soap exclusively to make shampoo, using this recipe, I will be able to make eight 8oz bottles of  shampoo. So, that’s $1.25 per bottle of organic, custom-made shampoo. As a point of reference, one 8oz. bottle of Rainforest Shine Shampoo from The Body Shop costs $4.00 (but The Body Shop’s Ginger Shampoo costs $10.00 per 8oz), an 8oz. bottle of Organics Shampoos cost $5.50 on average (as do the confusingly similar Organix shampoos), and Burt’s Bees averages about $8.00. And 80z of homemade shampoo can easily be found for upwards of $15.00 on etsy.com and from other smaller purveyors. So, yeah, if you want the organic, good-for-you, good-for-the-planet stuff, you will definitely save money making your own…And it’s super easy!

What You Will Need:

Yields one 8oz bottle, but recipe can be multiplied for larger batches

– 4 ounces of unscented liquid castile soap, such as Dr. Bronner’s, Desert Essence, or Dr. Woods

– 4 ounces distilled water

– 1 teaspoon of coconut, jojoba, avocado, grapeseed, or other light natural oil

– essential oil, herbs, tea bags, extract, or whatever you want to scent your shampoo with!

Directions for Shampoo Using Essential Oils or Extracts Only:

1. Mix together castile soap, water, and oil

2. Funnel mixture into an 8oz plastic container

3. Add 15-20 drops of extract or oil into bottle

4. Shake well

Yup, it’s that easy.  Homemade shampoo is a thinner consistency than store-bought however. You need to tilt the bottle directly over your head, but it lathers nicely, cleans well, and will leave your hair light and shiny. I used peppermint extract when I made shampoo with the above recipe. It is a great energizing scent, perfect if you prefer to bathe in the morning. My husband loves this one…

Directions for Shampoo Using Herbs:

Though slightly more complicated than the above recipe, this one’s still pretty foolproof…

1. Boil water

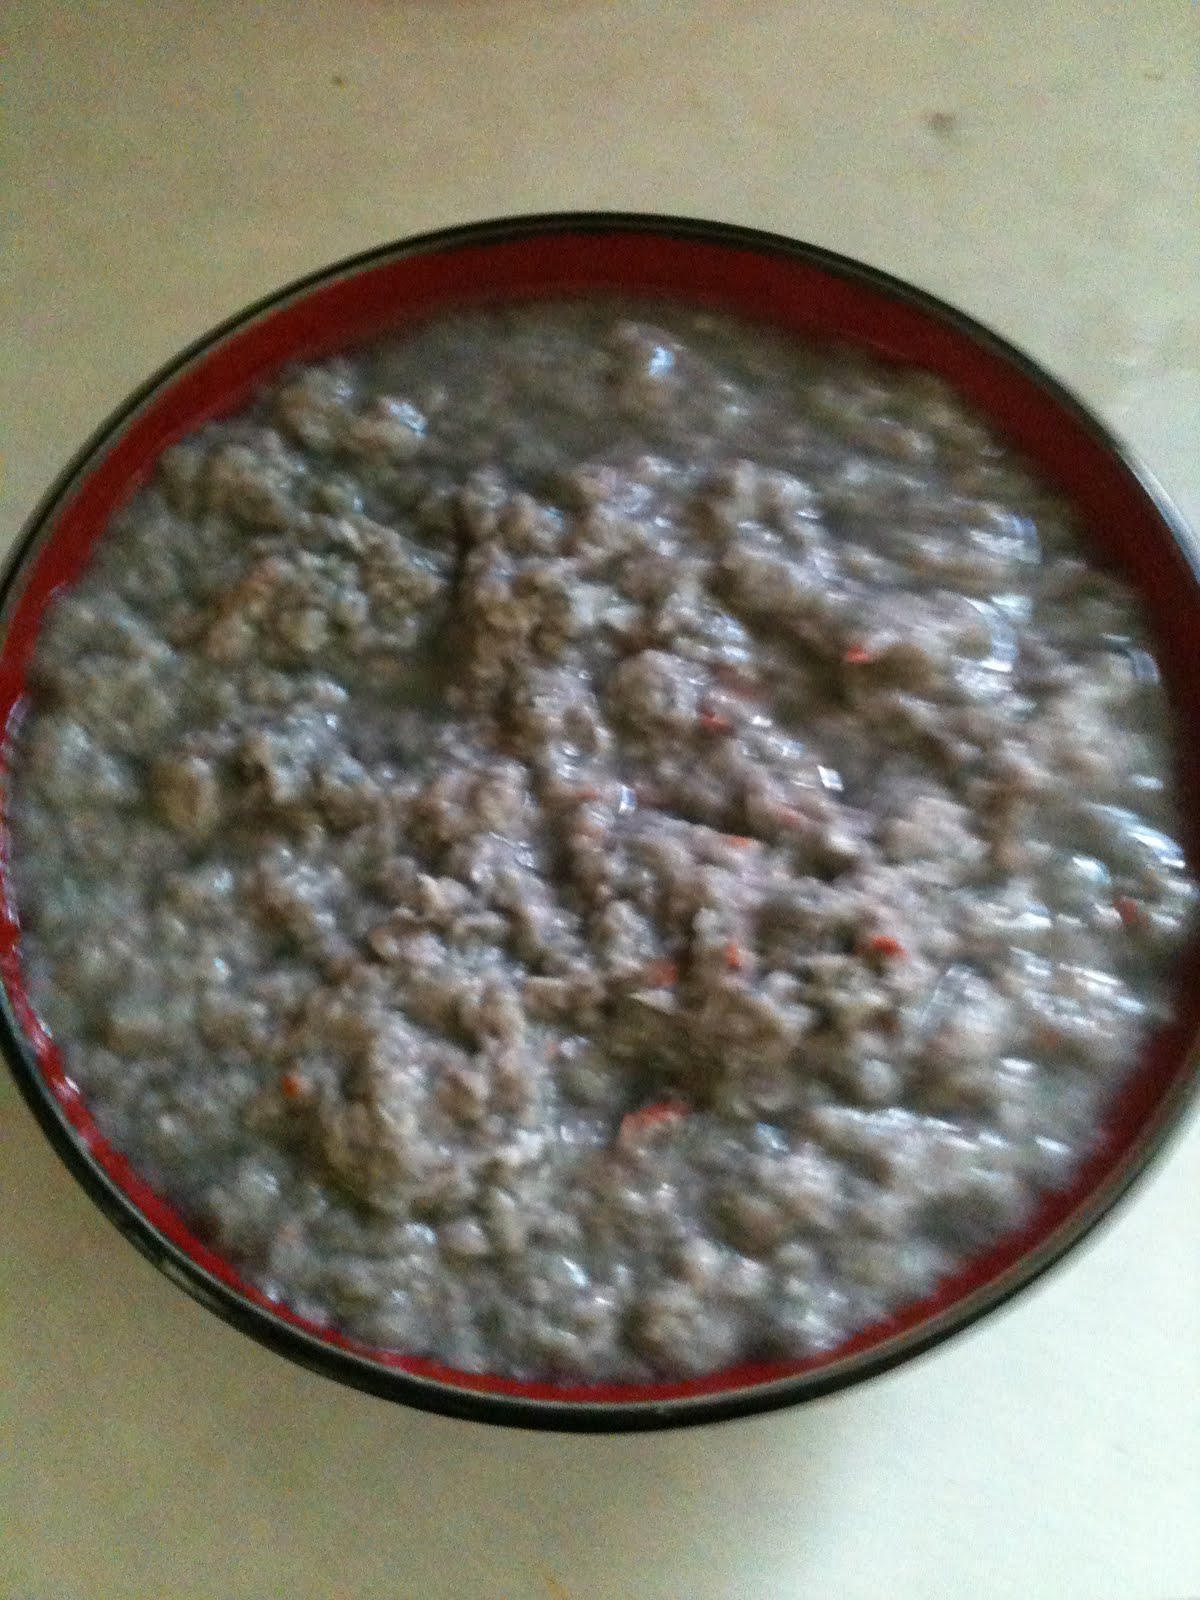
2. Add herbs, flowers, tea bags, leaves, or spices. I used about 1/3 lavender per 1/2 c. water plus two bags of chamomile tea here, but you can use whichever herbs you like. See section below for some notes on aromatherapy and suggested scent combinations

3. Turn heat to low and let just barely simmer for 20 minutes

4. Strain

5. Allow to cool completely

6. Combine herb water with castile soap and oil. Add additional essential oil if desired (I added about 10 drops of rose oil to mine).

7. Funnel into a plastic container and shake well.

As you can see, the lavender imparted a very dark hue to the shampoo — not to worry — it will not effect your hair color. I have very light blond hair, and have seen absolutely no change in my hair color since I started using this shampoo. Your shampoo may come out green, purple, yellow, or brown, depending on which herbs you choose. While chamomile does have a very slight bleaching quality, and hibiscus may augment reds, most herbs will not alter your hair color at all.

Different scents effect us in different ways. Below I have categorized some common scents into some basic categories that I thought may be helpful in determining which ingredients to select for your shampoo:

If you want an energizing shampoo select:

– Peppermint, Ginger, Citrus, Pine, Thyme, Sweet Basil, Eucalyptus, Nutmeg, Rosemary, Tea Tree, Green Tea or Thyme

If you prefer a relaxing scent, to help reduce anxiety and promote sleep select:

– Cedarwood, Chamomile, Sandalwood, Cinnamon, Sage, Bergamot, Rose, Neroli, Myrhh, or Marjoram

If you something mood-lifting try:

– Geranium, Ginger, Juniper, Citrus, Mandarin, Nutmeg, Oregano, Rose, Tangerine, Sage

Something comforting:

– Vanilla, Allspice, Cardamom, Cinnamon, Clove, Fennel, Marjoram

Or for something sensual try:

– Ylang-ylang, Jasmine, Sage, Neroli, Patchouli, Rose, Sweet Orange, Vanilla, Cinnamon, Gardenia

Some awesome scent combinations:

Sensual/Exotic: Vanilla + Rose + Cardamom

Relaxing/Comforting: Lavender + Coriander + Rose + Patchouli

Stress banishing: Lavender + Juniper + Orange

Relaxing: Lavender + Rose + Cedarwood

Sensual/Comforting: Rose + Patchouli + Jasmine

Sexytime: Ylang-ylang + Sandalwood + Vanilla

Anti-depression: Lemon + Sweet Orange + Ylang-ylang

Energizing: Rosemary + Peppermint + Holy Basil

Calming/Exotic: Vanilla + Cinnamon + Clove + Cardamom

Make your own shampoo for healthy, chemical-free, shiny, scent-sational hair! If I do say so myself….

Leave a comment

Filed under Uncategorized

How to Make Paper at Home

Yep, you read that correctly: today’s project is homemade paper! Ambitious, I know…Let me say, first of all, that this is definitely a lot easier than you would think, but admittedly does take a bit of practice to get really good at. But hey, it’s fun even while you’re getting the hang of it, and how many people do you know who make their own paper? Not too many I’d bet….Homemade paper makes a terrific gift and you can personalize it any way you like to make your very own super-unique signature stationary — dried flower petals, perfumes, leaves, bits of string, even dryer lint can be added to your paper to make something totally beautiful and totally you. Best of all, making your own paper requires no special equipment (a blender is all you need) and uses items which you most likely already have at home — the only thing I had to buy was panty hose!
Aside from being a fun and rewarding activity, making your own paper is also a great way to recycle. You can use whatever paper you have lying around — old newspapers, used wrapping or tissue paper, junk mail, construction paper, old receipts — turn your trash into something useful and gorgeous!

What You’ll Need:

– Whatever paper(s) you’d like to use
– A large bowl
– A blender
– Glue (just regular school glue like Elmer’s)
– Panty Hose
– Wire Hangers
– Something to plug your sink with
– Whatever you’d like to add to your paper (leaves, string, etc)
– Perfume or essential oil if you want scented paper
– Sunshine

Directions:

1. Assemble the paper you’d like to use. (As a general rule, every 1 cup of loosely packed paper pieces yields one sheet.) I used a combination of newspaper, junk mail, and expired coupons:

2. Tear up your paper into small pieces, approximately one inch square. The larger the pieces the longer they will have to soak before you can work will them. Also, thinner, cheaper papers like newspaper and tissue will take less time to soften and break down than printer paper or card stock. Measure your paper pieces and place in a heat proof bowl:

3. Boil an amount of water equal to the amount of paper you’re using. For example, I started with 2 cups of torn paper so I used 2 cups of boiling water which yielded two 7in x 9in sheets of paper. Pour boiling water into bowl with paper pieces:

4. Let paper sit in hot water for 2 or more hours. Meanwhile, it’s time to begin making your screens!

5. First, figure out how many screens you will need. As I said, I was using 2 cups of paper, anticipating a 2 sheet yield, so I made two screens. If you are using three cups of torn paper, you will want to make three screens, and so on….

6. Shape coat hangers into rectangles or squares. You could also use empty picture frames with the glass and back removed or something similar, but coat hangers are cheap and readily available.

7. Stretch panty hose over hangers, being careful not to tear them or create a run. Cut and tie so that hose are fairly taut and you have a sturdy screen:

8. Now that your screens are done you can return your attention to that paper! Once the pieces have soaked in water for a couple of hours (you can also help accelerate this process if you are getting impatient by tearing up the pieces into smaller bits with your hands) they should be broken down enough to blend. Add about a cup of the water/paper mixture to the blender at a time and pulse, adding more water if necessary. Keep in mind though that the more watery your paper pulp the thinner and more difficult your sheets of paper will be to work with.

9. Now you can add whatever you’d like to your pulp. I added dried rose and hydrangea petals, lavender, and rose oil. Mix well.

10. Fill your kitchen sink with about four inches of tepid water. As water is running add glue (about 4 tablespoons of glue per 2 cups of paper, but this does not have to be precise — you can eyeball it)

11. Press your first screen to the bottom of the sink

12. Spoon a portion of your paper pulp over the screen until covered and let settle:

13. Very slowly lift your screen up out of the water, try for 45-60 seconds from sink bottom to water surface, if you can.

14. Set somewhere flat and sunny to let dry:

15. Repeat steps 11-14 for remaining screens. You may have to drain and refill your sink if the water becomes too murky

16. Let paper dry completely. How long it takes will depend upon the thickness of your paper. I put my screens out in late-afternoon, left them out overnight, and then let them sit and soak up the first few hours of morning sun too, just to be safe.

17. Slowly peel paper from screens

18. Trim edges if you like (a matter of aesthetic preference), and you’re ready to write! How cool is that?!

* My paper smelled AMAZING but I used rose petals that were yellow with red tips and after the hours in the sun the yellow parts of the petals turned a rather unpleasant shade of brown. My suggestion is that if you’re going to use flower petals use ones at the darker end of the color spectrum.

1 Comment

Filed under Uncategorized

Homemade Laundry Detergent

In my attempt to buy less and to use as few chemicals as possible in our home, I thought I would try making my own laundry detergent. I was really surprised by just how easy it is to make, and by how well it works. Plus, all of my ingredients only cost around $8 dollars and I will have enough supplies to make at least five more batches after this! Not that I will need to make more any time in the near future — after spilling about a quart of it and giving half of a gallon to my sister, I still have over two gallons left! At $15 per gallon (on average) for store bought detergent I am going to save a ton of money making my own!

What You Will Need:

– 1 cup of soap flakes or 1 bar of regular (any kind) soap
– 1 cup of washing soda
– 1/2 cup of borax
– A large pot
– A measuring cup
– A 4-5 gallon bucket
– A box grater if using bar soap
– Essential oil (optional)
*You can find both borax and washing soda with the laundry detergents in most grocery stores


Directions:

1. Put 4 cups of water into a large pot and set to boil.

2. Reduce heat to simmer and begin grating your soap into the water, stirring occasionally:

3. Once soap has melted and dissolved completely into the water remove from heat

4. Pour 3 gallons of warm tap water into your bucket

5. Add the hot soapy water from the stove to the bucket

6. Add washing soda, borax powder, and essential oil if you are using it. Mix well:

7. Cover and let sit somewhere overnight — I put mine out on my porch just covered with a dish towel and it was fine….This is what I found in the morning:

It had a thick gelatinous film over the top of it, and, as you can see, also had many white splotches. I was dubious…but, after mixing it up this is what it looked like:

It was pretty similar in consistency to the detergent I usually buy, though it did have some lumps, and it smells amazing! (I used cedarwood oil in it.)

You can leave it in your bucket and just scoop it out as you need it or use a funnel to transfer it to smaller containers. I spilled about a quart of it, gave away a 1/2 gallon, and still had all of this left over:

I won’t have to make any more for quite a while! I wanted to test it out to see how well it worked and also to make sure that it was gentle enough to use on my infant daughter’s clothing and bedding. I decided to really put it to the test on my husband’s nasty carbon and grease stained work pants:

I did not foresee these stains budging, but the homemade detergent actually did pretty well, made even these smell great, and is definitely gentle enough for baby’s skin.

Not bad!

4 Comments

Filed under Uncategorized